Backpack mounting is one of those ideas that sounds perfect on paper for action cameras. You get hands-free recording, a stable first-person angle, and no helmet or head mount awkwardness. In reality, though, most backpack mounts fall short. They’re bulky, uncomfortable, hard to aim properly, and annoying enough that you end up not using them at all.
Over the past few years, I’ve tested a wide range of backpack mounts for both action cameras and 360 cameras. While some technically worked, none of the purpose-built options ever became part of my regular setup. I’d try them for a few outings, get frustrated, and then they’d sit unused.
Recently, that finally changed. I’ve landed on a backpack mounting setup for my Osmo Action 6 that I actually enjoy using, and more importantly, one that I’m happy to leave attached to my backpack full-time. It delivers usable footage, stays comfortable all day, and works as a practical secondary angle alongside handheld and neck-mounted shots.
Interestingly, this didn’t come from buying another dedicated backpack mount. It came from adapting a backpack clip that was already working extremely well for my 360 cameras.
Before getting into the setup itself, it’s worth explaining the three main problems that most action camera backpack mounts struggle with.
Why Most Backpack Mounts for Action Cameras Don’t Work
Comfort and Bulk
The biggest issue is comfort. Almost every backpack mount I’ve tried makes the shoulder strap noticeably worse to wear.
Wrap-style mounts create a thick pressure point on the strap and tend to slide around, especially on thinner backpack straps where they can’t grip securely. Clamp-style mounts solve the slipping problem, but they introduce a different issue: they’re bulky and intrusive.
With clamp mounts, you’re constantly aware something is attached to your strap. The clamp teeth bite down hard, the camera sticks out awkwardly, and the whole setup makes the backpack feel heavier and unbalanced. Even when you’re not filming, it feels like something you should take off.
For a hands-free setup, that’s the opposite of what you want.
Poor Framing Control
Framing is the second major problem.
Many wrap-style backpack mounts only allow the camera to pivot on one axis. When set up for landscape video, the camera naturally points outward instead of straight ahead, making it almost useless for POV footage.
Clamp-style mounts often add a ball joint to fix this, but that introduces new issues. The plastic ball joints feel cheap, add even more bulk, and tend to loosen over time. Even when they hold, there’s always a slight lack of confidence that the framing will stay exactly where you set it.
Not Practical as a Permanent Mount
The third issue is usability when you’re not filming.
A backpack mount only makes sense if it’s something you’re happy leaving on your bag full-time. Clamp-style mounts aren’t designed for that. They’re meant to be attached and removed every time you want to record, which adds friction and discourages spontaneous shooting.
Wrap-style mounts are slightly better, but they still add enough bulk and discomfort that I don’t want them permanently attached to my everyday backpack.

As a result, even mounts that technically work tend to get left at home.
Why Backpack Clips Work So Well for 360 Cameras
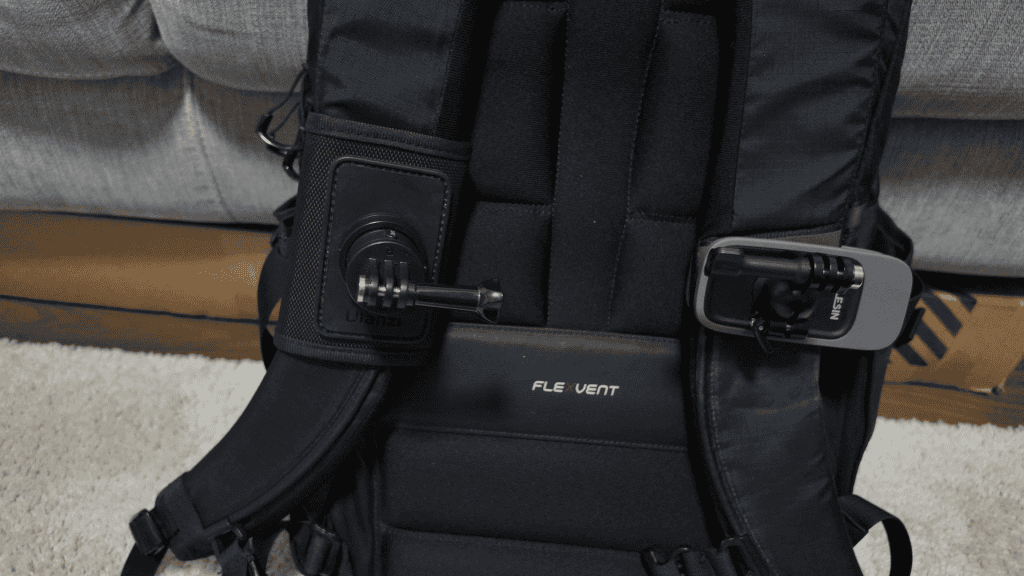
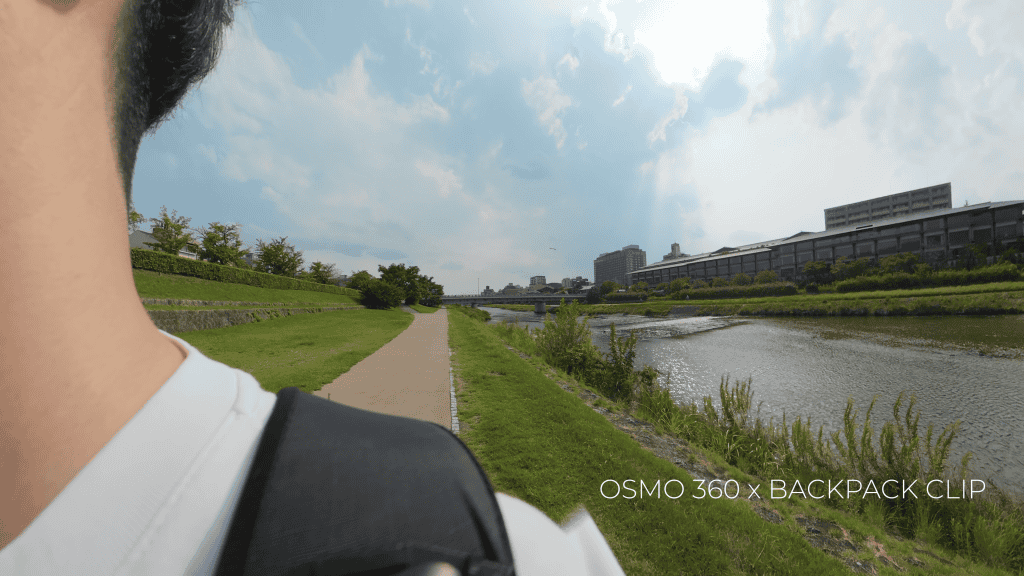
Despite all of that, I’ve had great results using this Peak Design backpack clip with 360 cameras.
The setup is simple. A 360 camera screws directly into a quick-release plate using a standard quarter-inch thread, clicks into the backpack clip, and you’re ready to record. The clip itself is compact, secure, and comfortable enough to leave on your backpack indefinitely.
Framing is also a non-issue. Because a 360 camera captures everything, orientation doesn’t matter. You decide on the framing later in post.
That made me wonder whether the same approach could be adapted into a practical backpack mount for action cameras.
Adapting a Backpack Clip for an Action Camera
Version One: Fixing Comfort but Not Framing
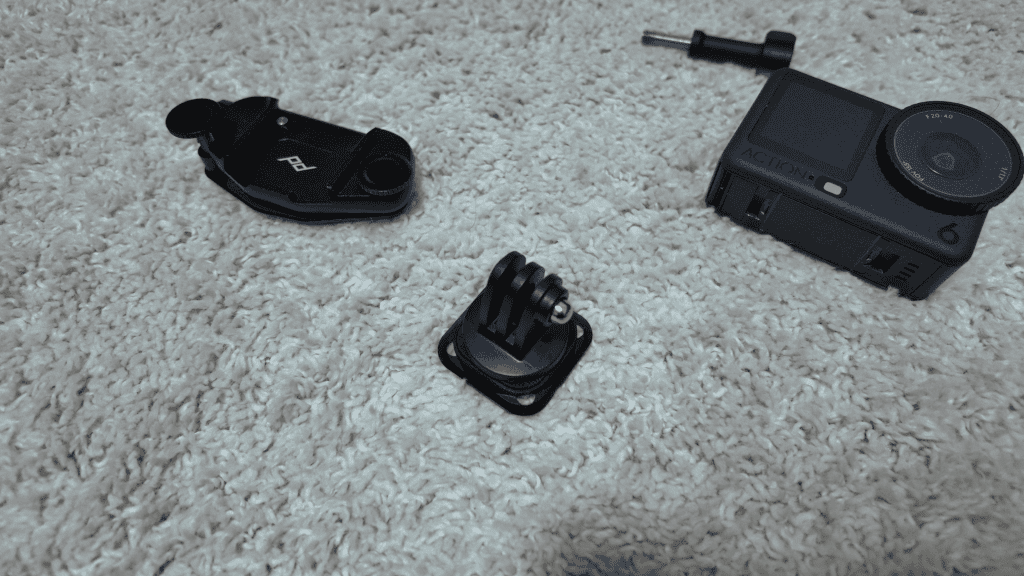
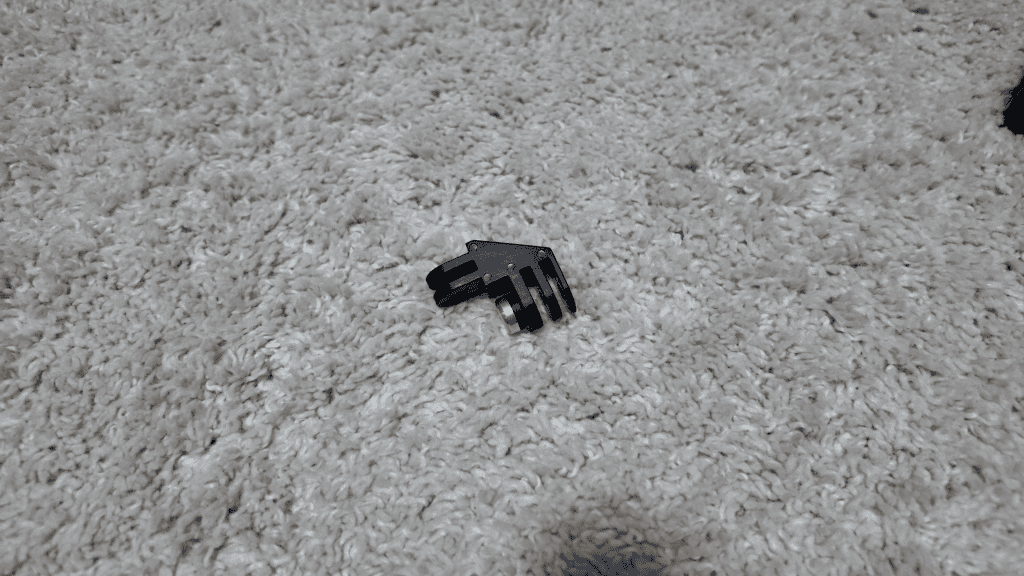
The first step was straightforward. I added a quarter-inch to action camera mount adapter to the backpack clip’s base plate.
This immediately solved two major problems. Comfort improved dramatically, and the setup worked perfectly as a permanent mount. The clip stayed slim, didn’t interfere with wearing the backpack, and felt secure at all times.
Framing, however, was still an issue.
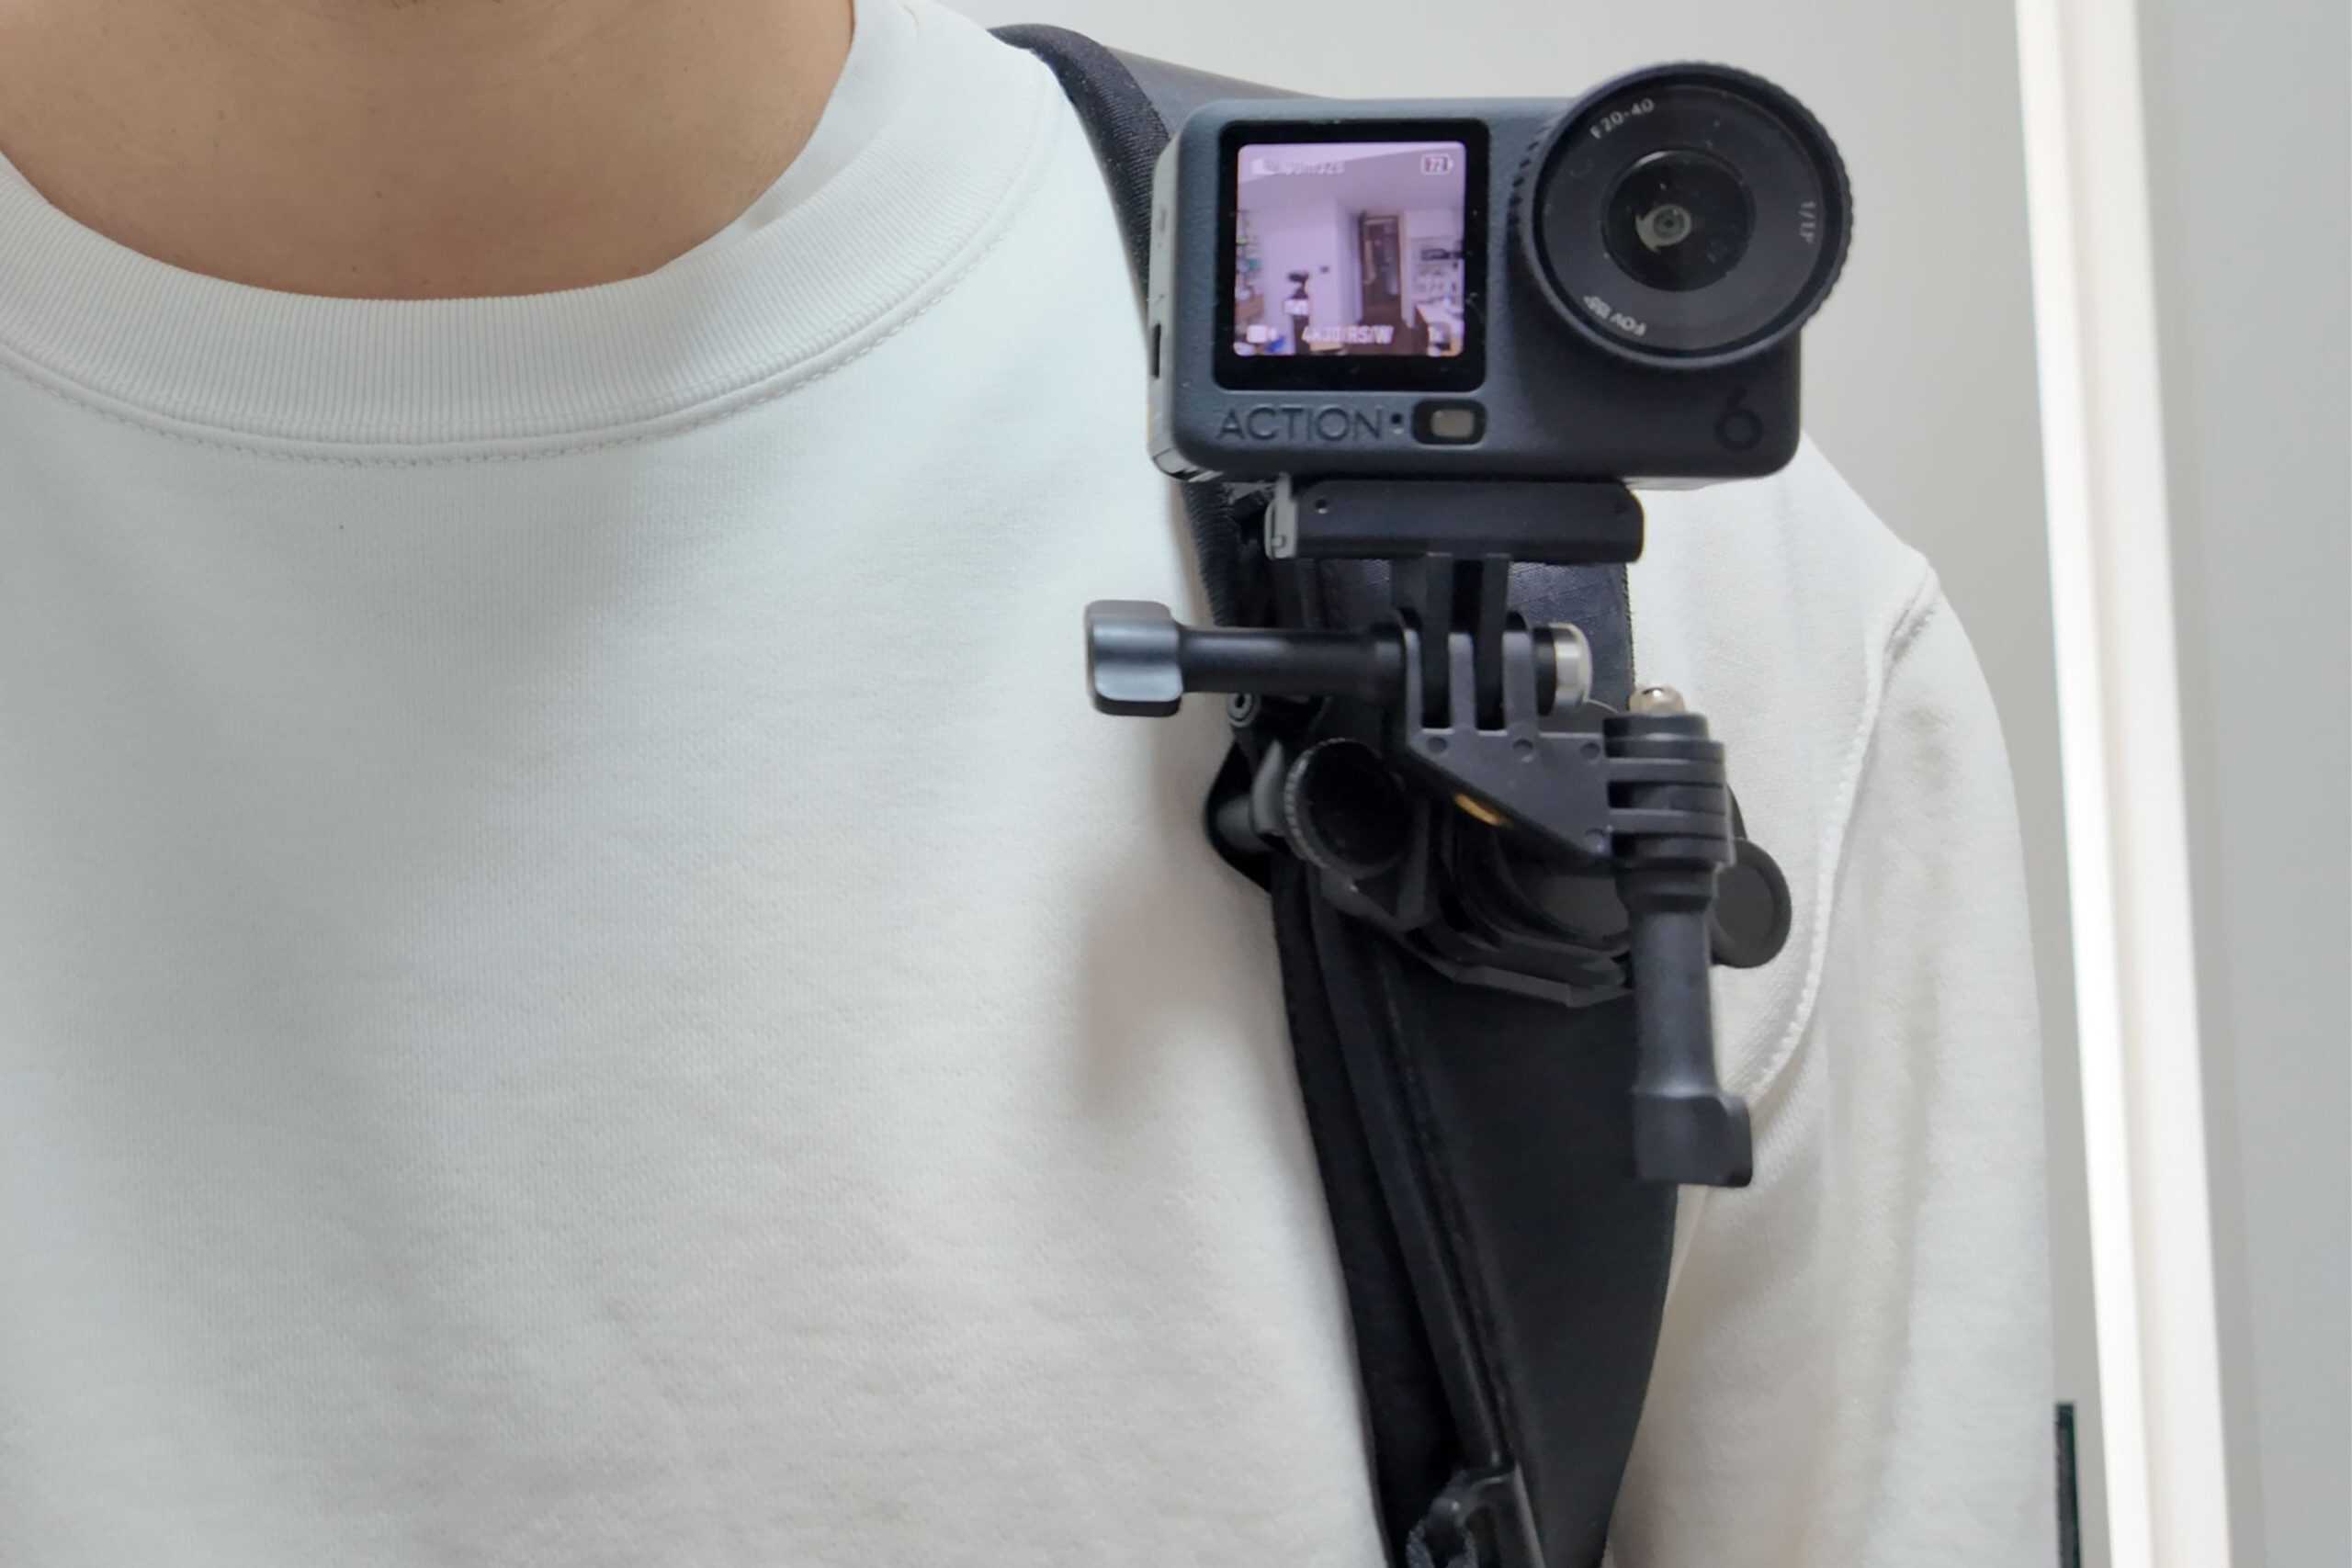
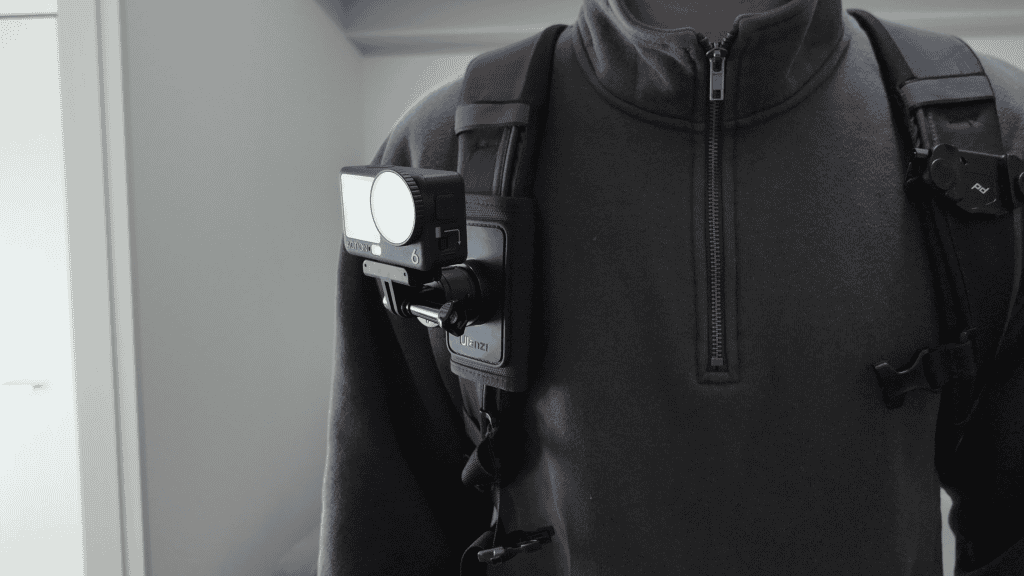
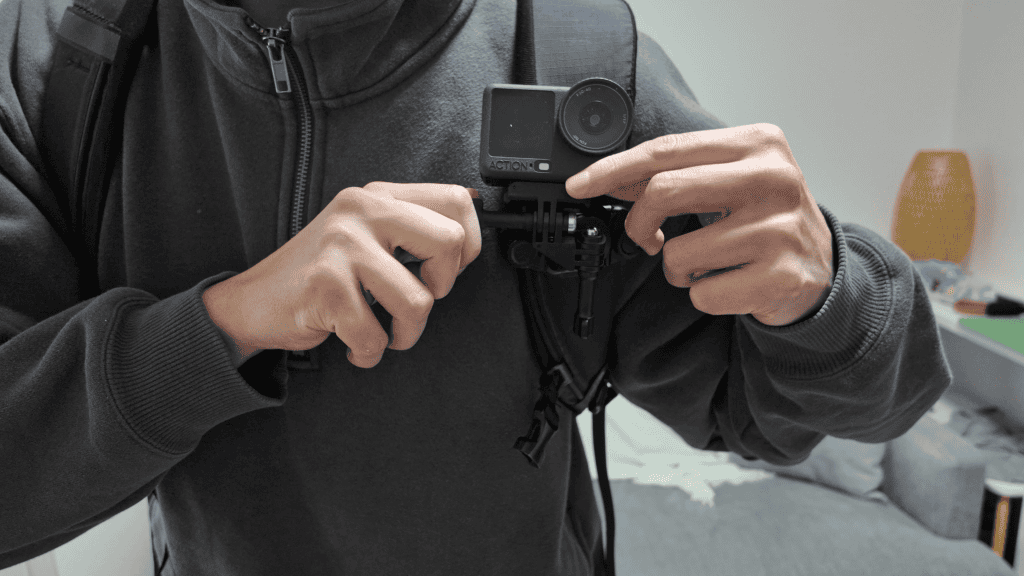
In this version, I mounted the Osmo Action 6 vertically. This allowed me to angle the camera inward so it pointed straight ahead instead of sticking out to the side. This works specifically because the Action 6 uses a square sensor, which lets you record landscape video even when the camera is mounted vertically.
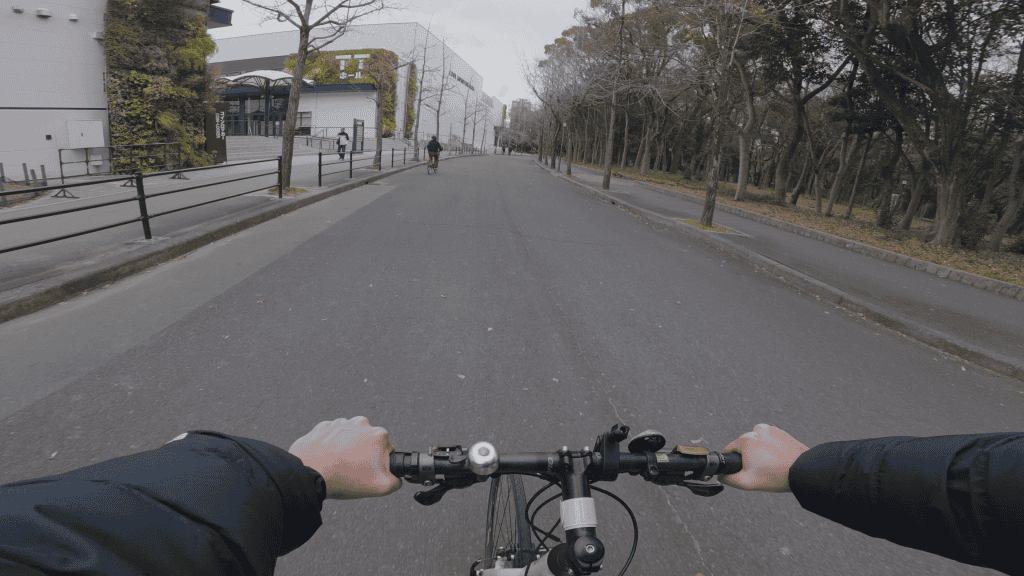
For walking footage, this setup worked better than expected. The limitation was tilt control. Without the ability to angle the camera up or down, framing quickly became restrictive, especially for cycling or situations where I wanted less ground and more of what was ahead.
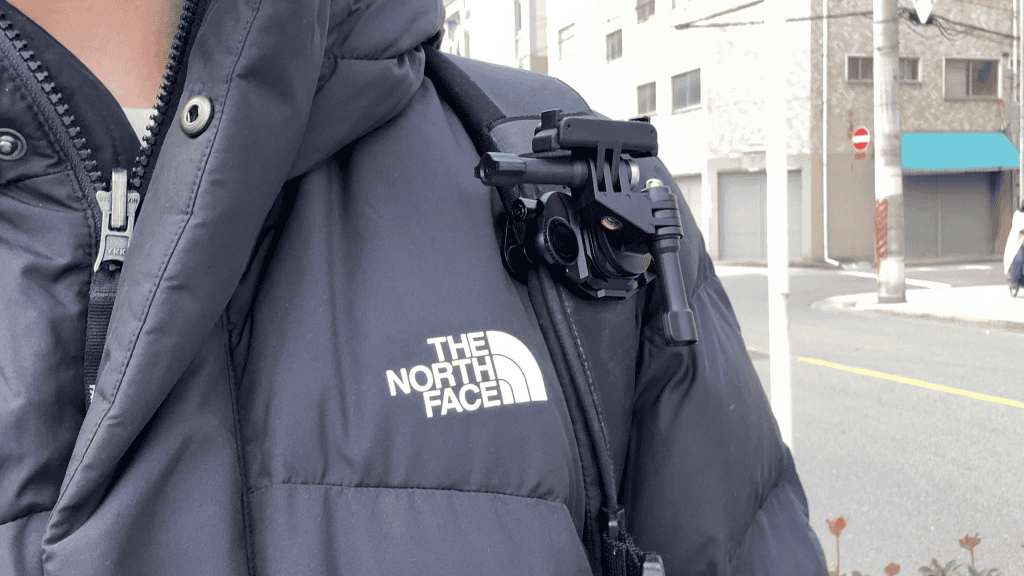
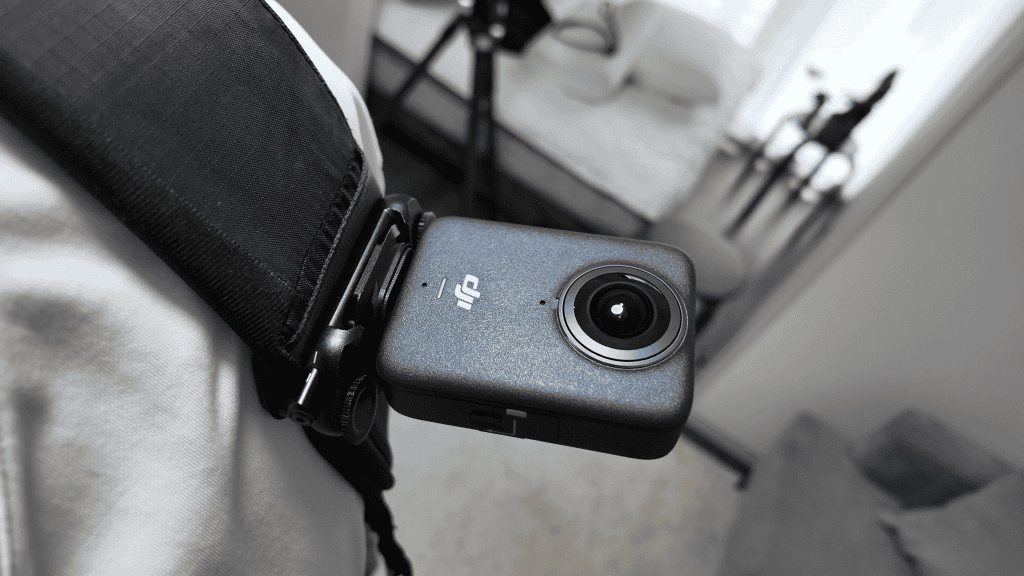
Version Two: The Final Custom Backpack Mount
To fix that, I added a simple 90-degree vertical bracket. This introduces a second pivot axis and finally allows proper tilt control.
This version solves all three of the original problems. It’s comfortable enough to leave on the backpack full-time, compact enough to forget it’s there, and flexible enough to dial in usable framing for different activities.
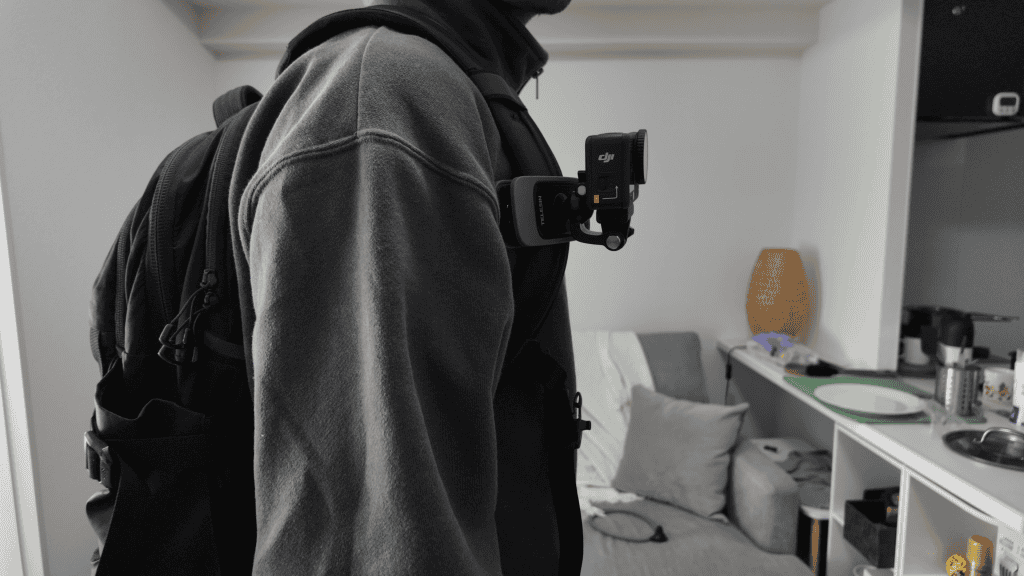
This is the version I’ve been using the most, and it’s effectively the final form of this custom backpack mount.
Is This the Best Backpack Mounting Method for Action Cameras?
In practice, this setup is a clear step up from every purpose-built backpack mount I’ve tested. It’s not something I use constantly, but it’s now a reliable option rather than an experiment.
Compared to using a backpack clip with a 360 camera, it’s slightly less seamless. With an action camera, you need to physically aim the camera when you want to change your point of view, and you lose the ability to reframe shots later.
That said, there are situations where this setup is actually preferable. Image quality is higher, the field of view is less extreme, and you’re less likely to get parts of your head creeping into the frame. You also commit to your framing while filming, instead of sorting everything out later in editing.
If you already own a backpack clip, adapting it into a custom action camera mount is absolutely worth trying. The cost is minimal, and the results are genuinely useful. Buying a clip solely for this purpose is a tougher decision, and whether it’s worth it depends on how often you plan to use backpack-mounted footage.