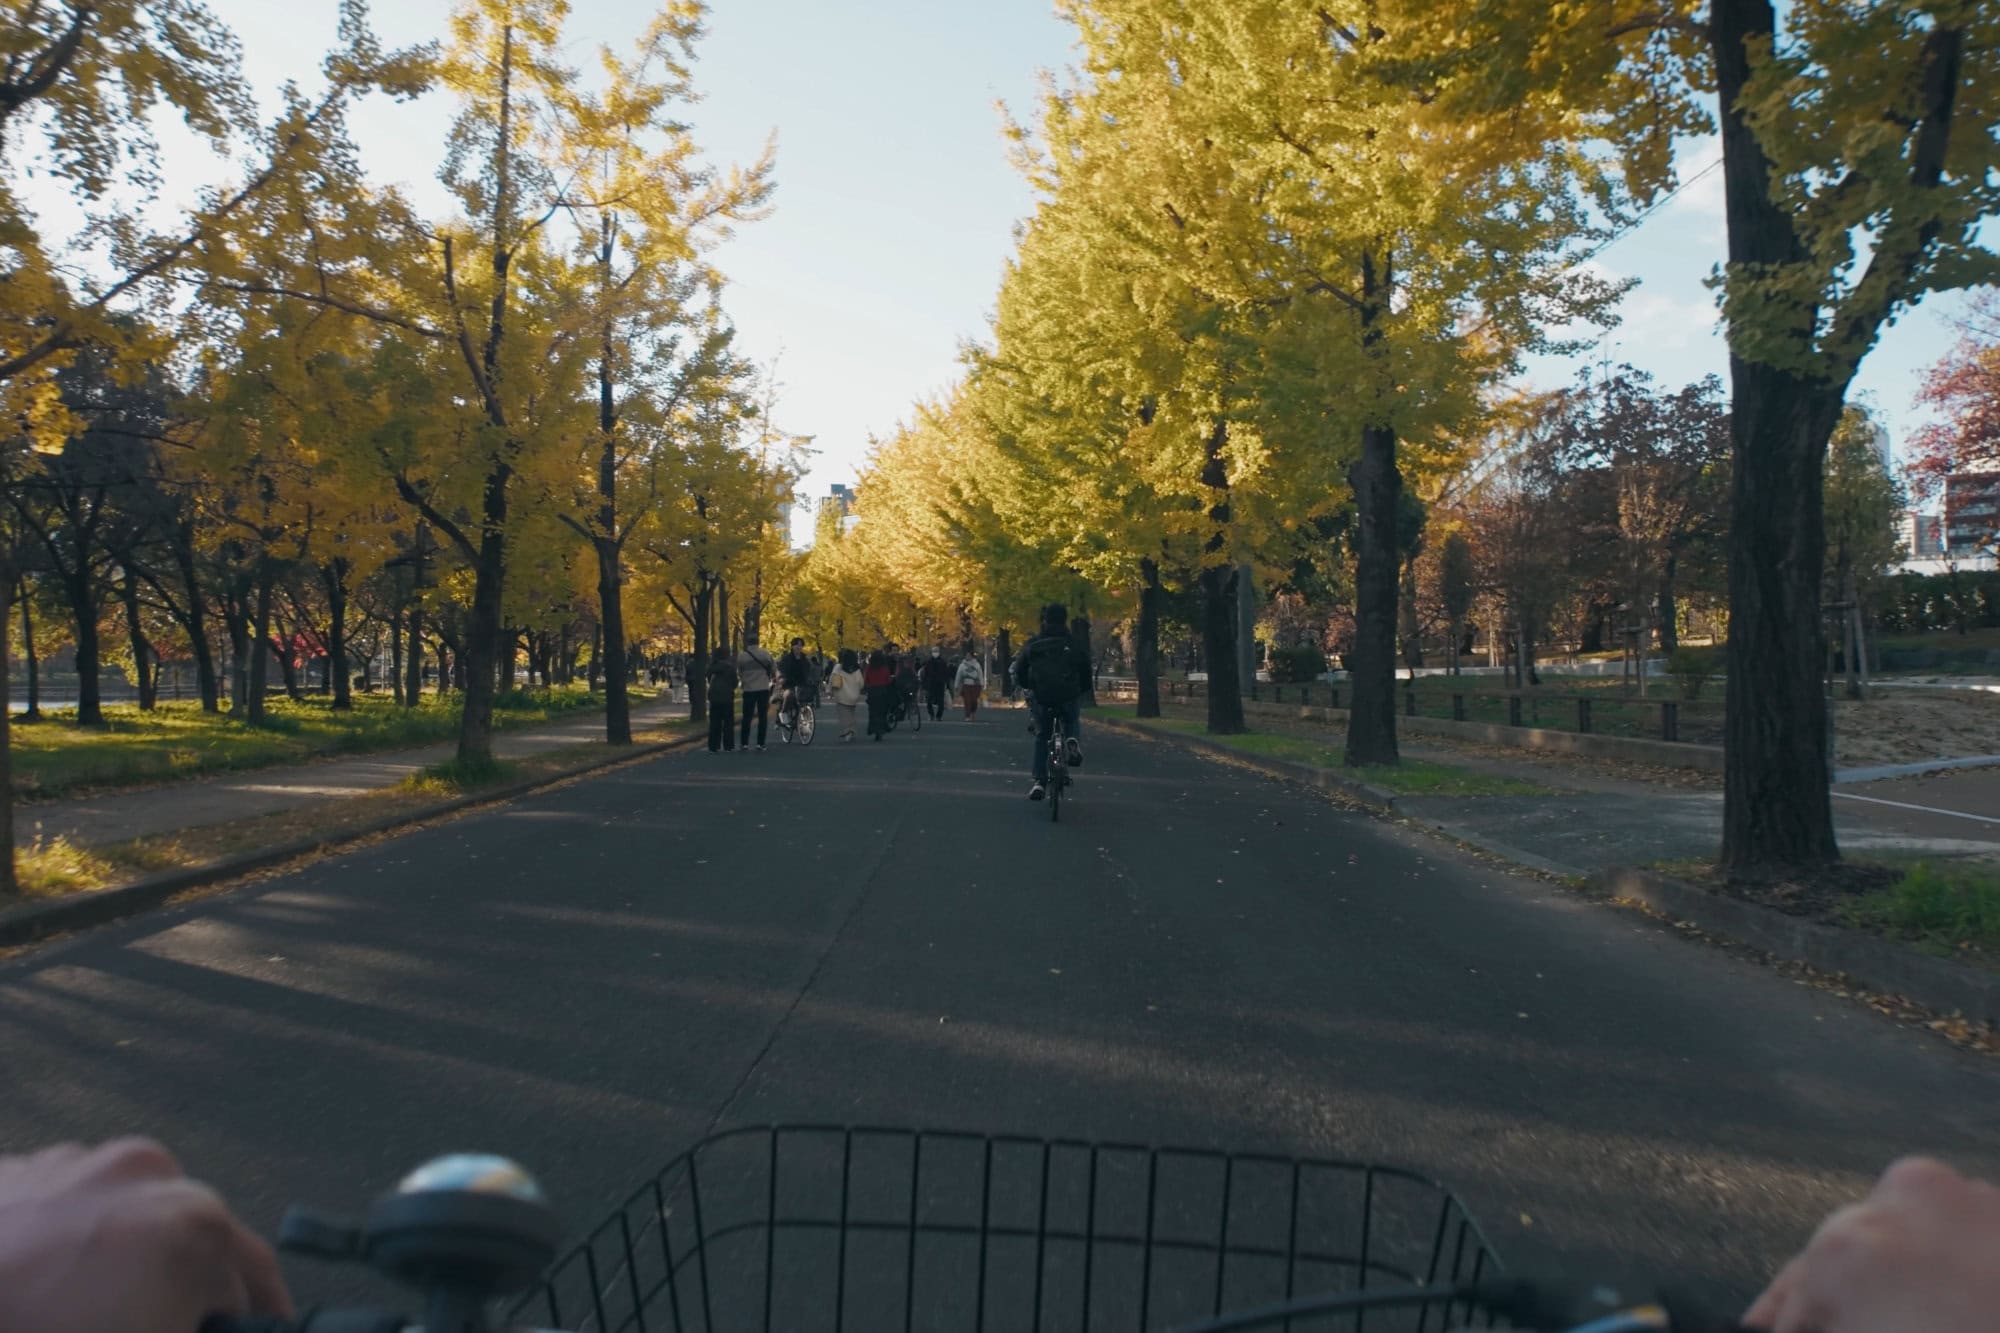
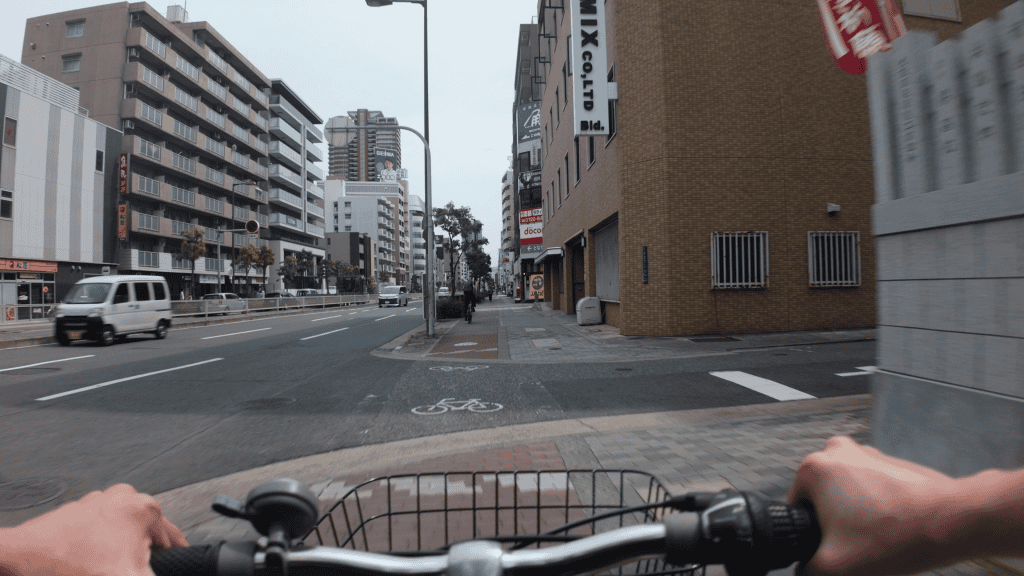
Since picking up the DJI Osmo Pocket 3, I’ve been a little obsessed with testing it for body-mounted shots on my bicycle. Traditionally, action cameras like the DJI Osmo Action 5 Pro are the go-to choice for this kind of footage—and for good reason. They’re rugged, compact, and built for high-motion environments.
But here’s the thing: the Pocket 3 has two standout advantages that can make it a better (and sometimes the only) option for certain biking scenarios.
1. Gimbal Stabilization = Natural Motion Blur
The Pocket 3 uses a mechanical 3-axis gimbal for stabilization, which means you can safely shoot at lower shutter speeds. The result? Smooth, cinematic motion blur without the ghosting or warping artifacts you often see on cameras that rely solely on electronic image stabilization (EIS). Note that ND filters are typically required to slow the shutter in daylight (more on this later).
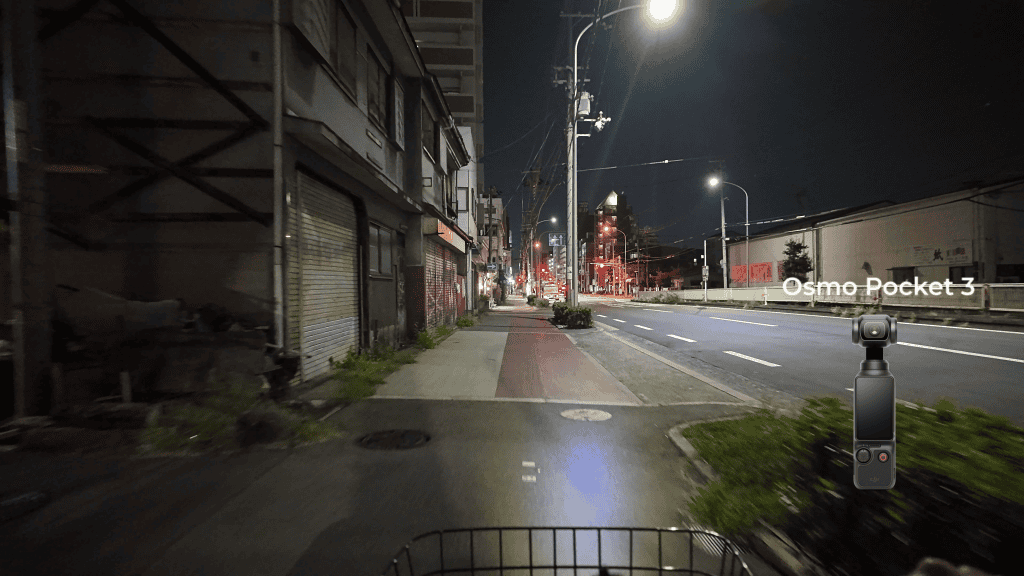
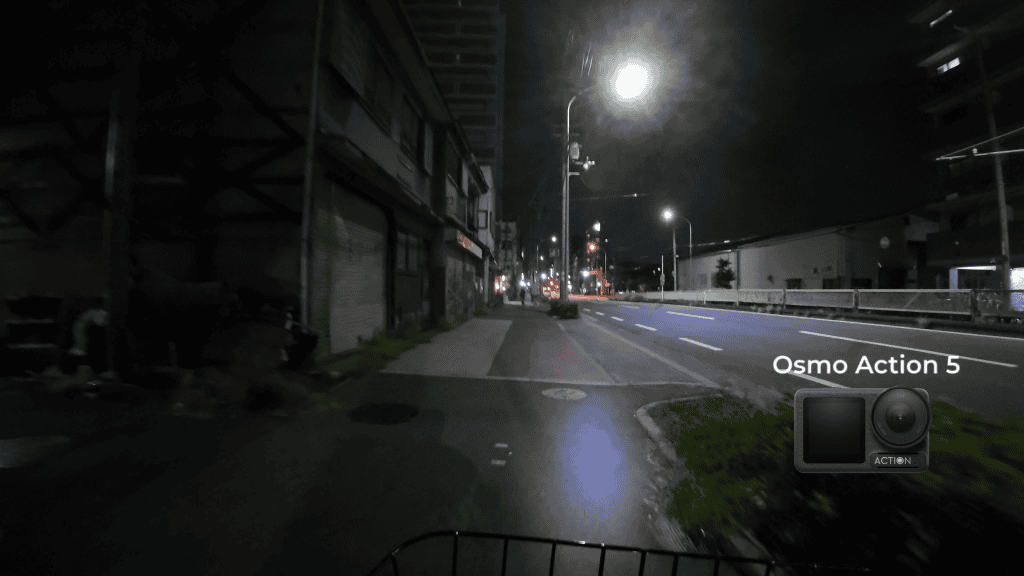
2. A Bigger Sensor for Better Low Light
Another huge advantage is the larger 1-inch sensor. If you’ve ever tried filming after sunset, you know how quickly smaller sensors start to struggle. The Pocket 3 captures cleaner, more detailed footage in low light, giving you an edge when your ride runs late.
Now, to be clear, using the Pocket 3 for biking is definitely a niche use case. It took me a lot of trial and error to figure out what works—and what doesn’t. So in this guide, I’ll share everything I’ve learned:
✅ The best mounting options
✅ Lens attachments worth using
✅ The ideal in-camera settings for sharp, stable footage
By the end, you’ll have everything you need to skip the guesswork and start capturing pro-level biking footage with your Osmo Pocket 3.
Mounting the DJI Osmo Pocket 3 for Cycling
Before we dive into the actual mounting setups, there’s one essential accessory you’ll need: the expansion adapter. Without it, the Pocket 3 can’t connect to standard action camera mounts—and those mounts are what almost every chest harness, backpack strap, or helmet rig uses.
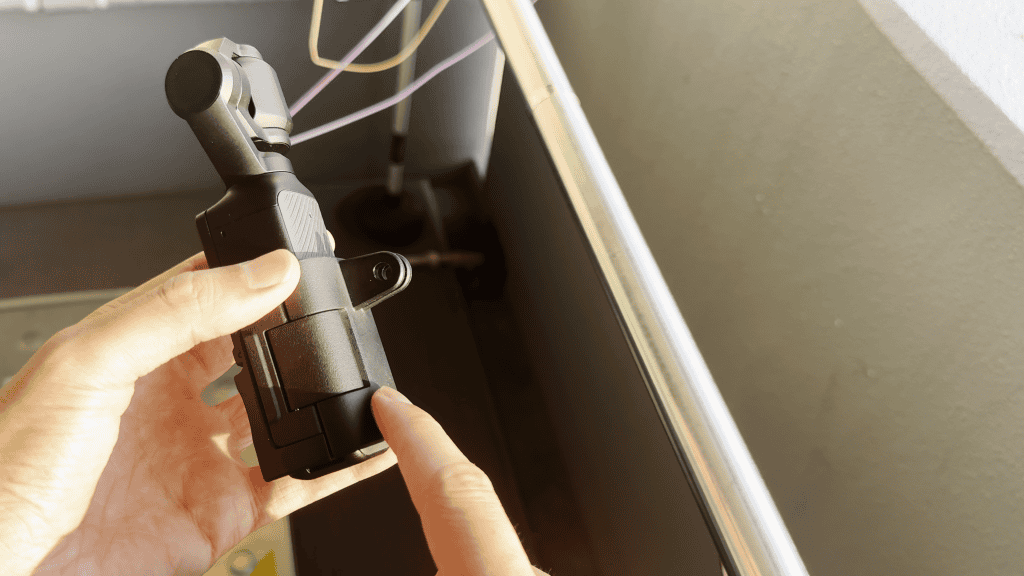
Why the Expansion Adapter Matters
The expansion adapter essentially converts the Pocket 3 into something that works with GoPro-style mounts. This is mandatory because it opens up an entire ecosystem of mounting solutions that were previously off-limits.
Which Adapter Should You Choose?
I personally stick with the DJI Official Expansion Adapter . It’s solid, reliable, and I’ve never had any issues with it. But if you’re looking for alternatives, here’s one that I like and one that I’m not so keen on:
- ✅ Ulanzi PK-06 – A solid third-party option that feels well-built.
- ⚠️ Sunnylife Adapter – I tried this one first and honestly, it felt too flimsy for something as valuable as the Pocket 3. I wouldn’t recommend trusting it for biking.
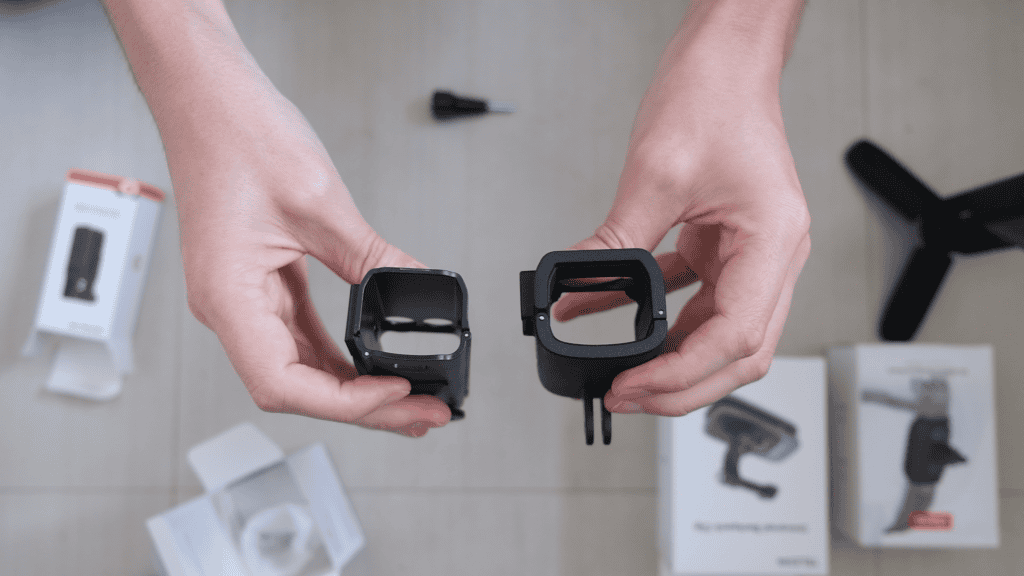
Bottom line: Don’t cheap out on the adapter. This is what keeps your Pocket 3 secure while you’re riding. If it fails, your camera is done.
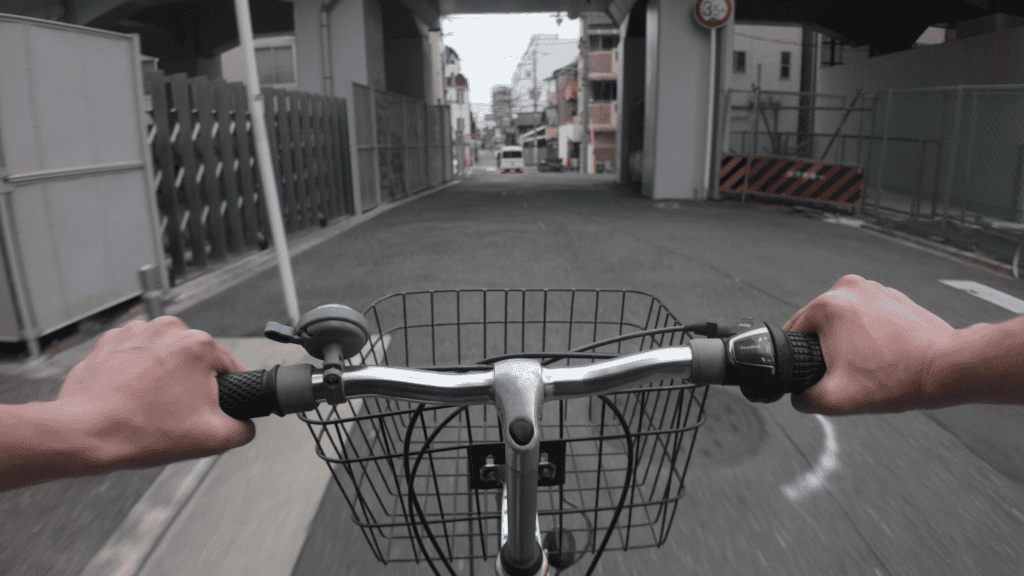
Why You Should Never Mount the Pocket 3 to Handlebars
Once you’ve got the expansion adapter, it might seem tempting to mount the Osmo Pocket 3 directly to your bike’s handlebars. After all, it feels like the most stable and straightforward option, right?
Unfortunately, that’s one of the worst things you can do. Here’s why:
The Problem with Handlebar Mounting
The Pocket 3 uses a delicate mechanical gimbal for stabilization. When you attach it to your handlebars, every single vibration from the road transfers directly into the gimbal. This doesn’t just ruin your footage—it can potentially damage the camera over time.
I tested this myself (so you don’t have to), and the results weren’t pretty. The footage was full of harsh vibrations and jitter—basically unusable. Definitely not worth the risk.
The Better Approach: Wear It
Instead of mounting the Pocket 3 to your bike, the best solution is to wear the camera on your body. Your body acts as a natural shock absorber, reducing vibrations dramatically.
That said, even with a body mount, remember:
- The Pocket 3 setup is more fragile than an action camera.
- Avoid intense, high-impact rides to protect the gimbal.
Chest Mount? Backpack Mount? Neck Mount?
After a lot of trial and error, I’ve tested three main body-mounting options for biking:
- ✅ Chest Mount
- ✅ Backpack Mount
- ✅ Neck Mount
Here’s what I’ve learned about each one:
Backpack Mount – My Least Favorite
While the backpack mount sounds convenient, it’s the one I use the least. Why? Two main reasons:
- The camera ends up slightly off-center, which can make the footage feel awkward.
- The angle tends to sit a little too high for my taste, missing out on that immersive first-person feel.
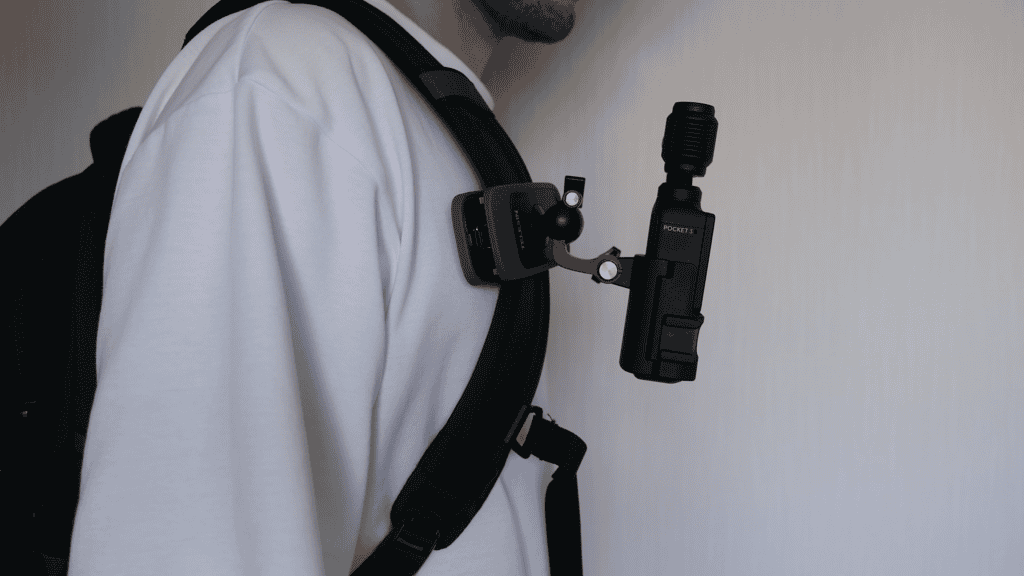
Chest Mount – Most Secure
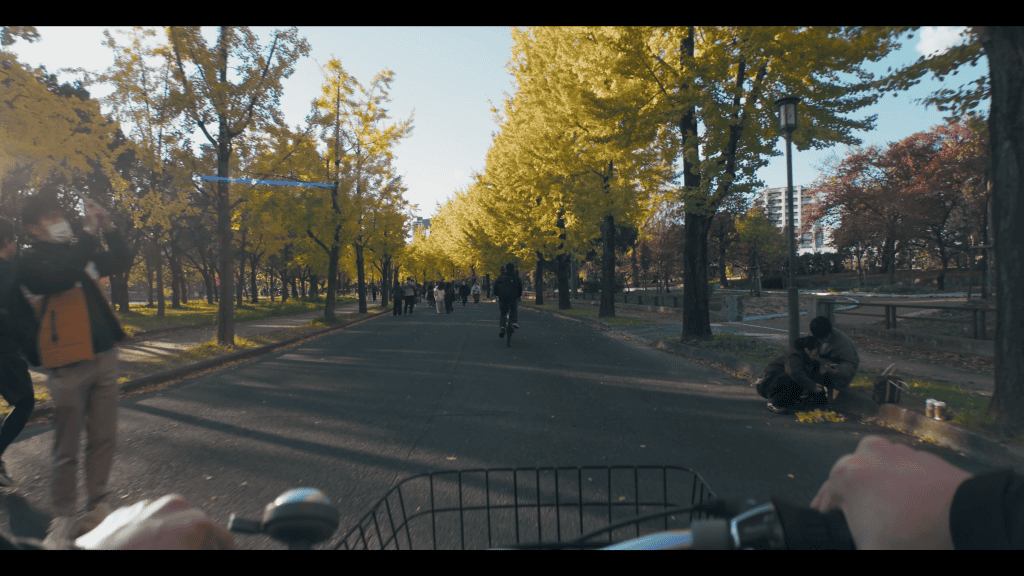
A chest mount like the DJI Osmo Chest Mount is the most secure and stable option. It also gives you the lowest camera angle, which is perfect if you want your handlebars in the frame. This adds a sense of speed and immersion that looks great in POV shots.
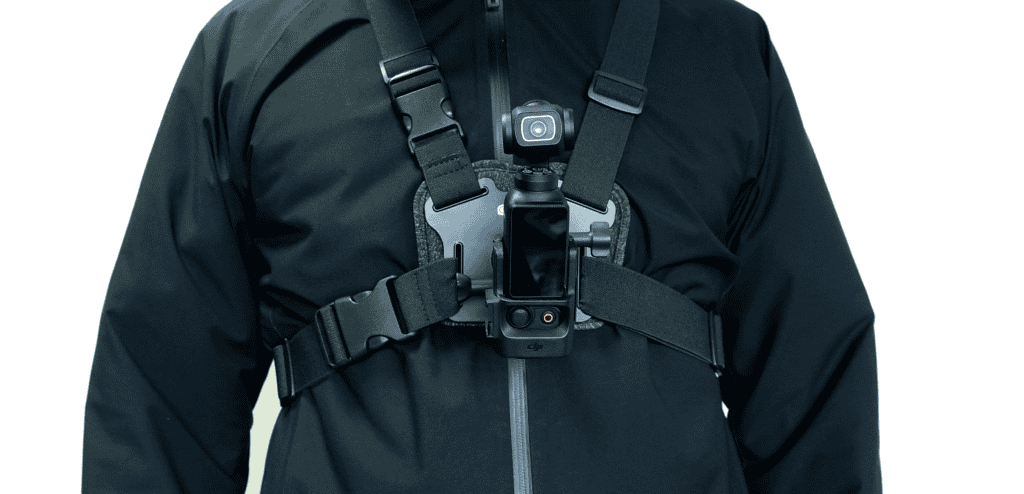
Downside? It’s a little more effort to put on and take off compared to the neck mount.
Neck Mount – My Current Go-To
These days, I find myself reaching for the neck mount more often. Why? It’s simply easier to wear and faster to set up than a chest harness.
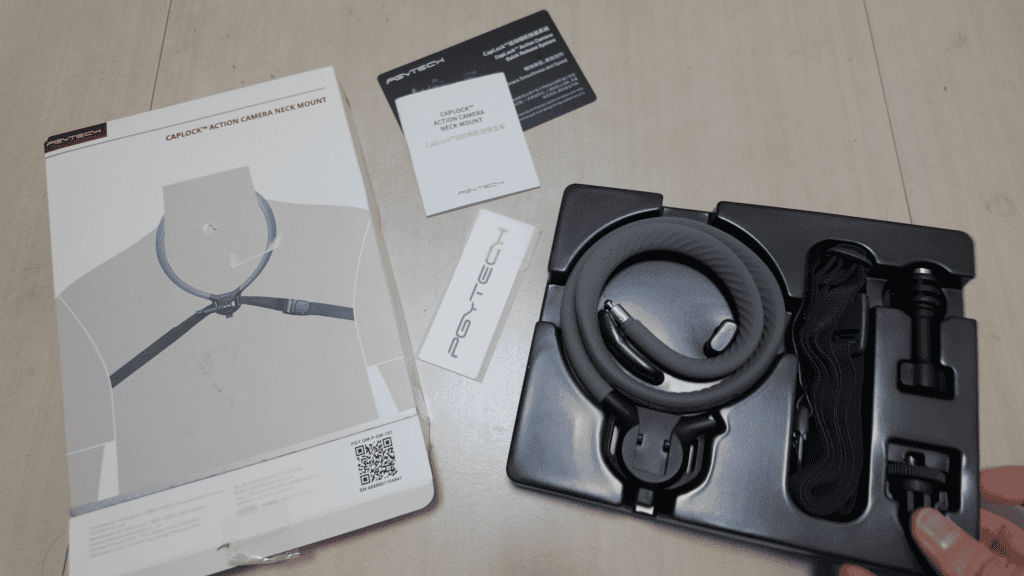
I personally use the PGYTech CapLock Neck Mount because it has a quick release that makes it easy to take the Pocket 3 off, as well as a strap which keeps the Pocket 3 securely held down.
However, there’s a catch:
- The angle usually sits a bit too high, so you might miss the handlebars entirely.
The Fix: I mount the Pocket 3 upside down, which lowers the camera just enough to include the handlebars in the shot. Your results will vary depending on your bike geometry (handlebar/seat height) and riding posture.
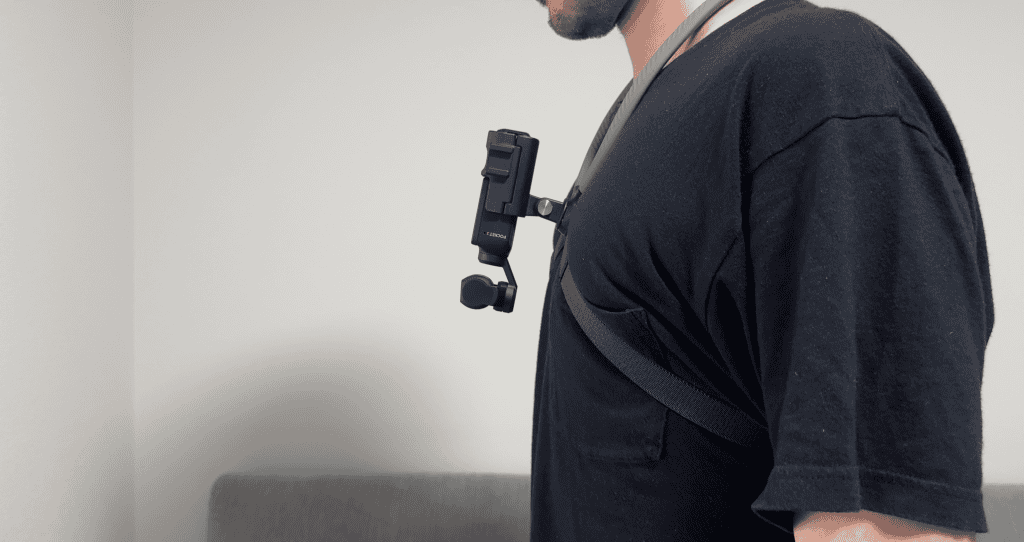
If you go with a neck mount, make sure it has a support strap—and use it. Without the strap, the camera tends to bounce around, leading to shaky footage. The strap keeps the camera locked in place for smoother, more professional-looking shots.
Optional Accessory 1: ND Filters
One of the biggest advantages of the DJI Osmo Pocket 3 over traditional action cameras is its mechanical gimbal stabilization. This feature allows you to shoot at slower shutter speeds—which is the secret to getting that cinematic motion blur in your biking footage.
Why Action Cameras Struggle Here
If you’ve ever tried to do the same on an action camera (like the DJI Osmo Action 5 Pro), you’ve probably run into a problem:
- Lowering the shutter speed introduces motion blur
- …but blurry frames are a problem for electronic image stabilization (EIS), causing ghosting and weird warping artifacts.
It’s a catch-22:
- Slow shutter = motion blur + stabilization issues
- Fast shutter = sharp stabilization but no motion blur
This is where the Pocket 3 shines, because its mechanical gimbal stabilizes the shot without relying on EIS—so you can drop that shutter speed safely.
Why You Need ND Filters
To shoot at slower shutter speeds in bright daylight, you’ll need an ND filter. ND filters reduce the amount of light entering the lens, letting you use a slower shutter speed without overexposing your image.
Without an ND filter, you’ll either have overexposed footage, or be forced to stick to a higher shutter speed which nets you no motion blur.
Optional Accessory 2: Wide Angle Lens
One thing you’ll notice when shooting biking footage with the DJI Osmo Pocket 3 is that its field of view (FOV) can feel a little tight compared to the ultra-wide perspective you get with most action cameras.
Why Add a Wide-Angle Lens?
Attaching a wide-angle lens helps open up the shot, making your footage feel more immersive and giving you a better chance of including the handlebars in frame. The effect is subtle—not as extreme as an action camera—but noticeable enough to make a difference.
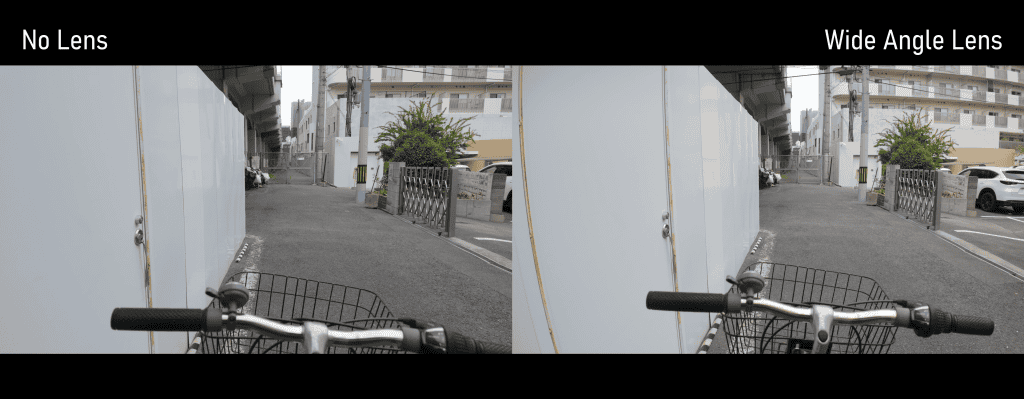
Is it essential? No. But if you want that extra sense of space, it’s worth considering.
The Problem: Wide Lenses vs ND Filters
Here’s the catch:
Most wide-angle lenses for the Pocket 3 aren’t designed to be used with ND filters. That means you often have to choose between:
- ✅ A wider field of view, or
- ✅ Proper motion blur using ND filters
…But not both.
The Solution: Freewell’s Wide + ND Kit
This is where the Freewell Osmo Pocket 3 Lens Kit comes in. It’s specifically designed so you can stack the included wide-angle lens with its ND filters, giving you the best of both worlds:
- A slightly wider FOV
- Controlled shutter speed for natural motion blur
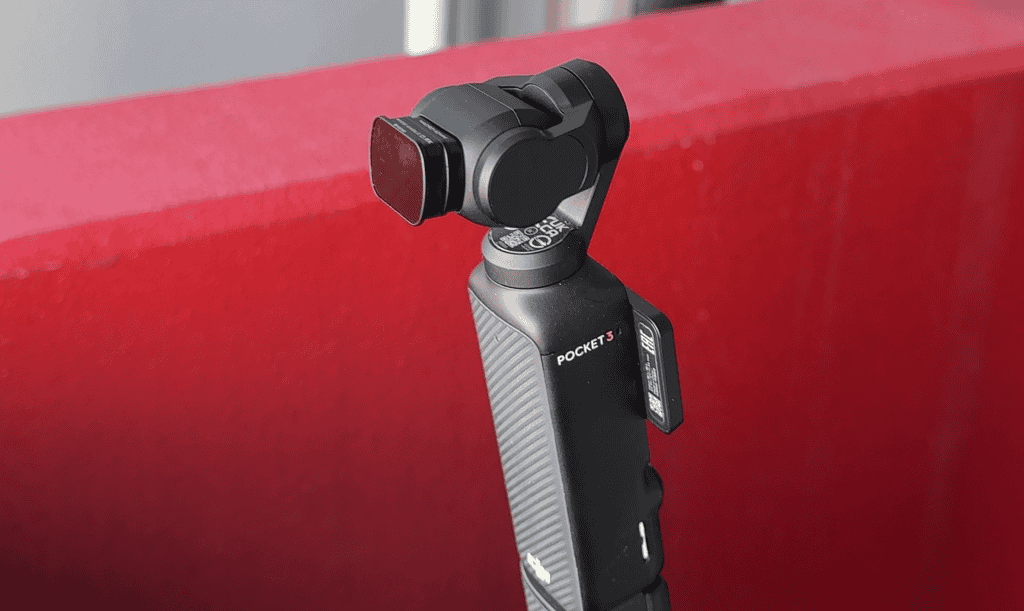
The Trade-Offs:
- The stacked setup adds noticeable bulk to the front of the Pocket 3.
- Image quality can take a hit—especially with the strongest ND128, where I saw a slight color cast around the edges of the frame when the lenses were stacked.
Anamorphic Lens
Freewell’s kit also includes an anamorphic lens, which widens your frame horizontally without changing vertical composition. Plus, you get those cinematic blue lens flares for a dramatic, stylized look—perfect if you want your biking footage to feel like a movie scene.
Essential In-Camera Setting: Wearable Mode
Now that we’ve covered the physical setup, let’s talk about the in-camera settings, starting with one of the most important features for biking: Wearable Mode.
This mode offers three big benefits that make life much easier when your Pocket 3 is mounted on your body:
1. Always Powers On Facing Forward
Wearable Mode ensures the camera starts in selfie mode, which means when you turn it on, it’s already facing the right direction (forward). No extra fiddling around required!
2. Horizon Lock with Tilt-Locked Gimbal
It puts the gimbal into Tilt Locked Mode, which keeps the horizon perfectly level. This is important because your body angle constantly shifts as you ride. Without tilt lock, the camera would keep pointing up or down, ruining your framing.
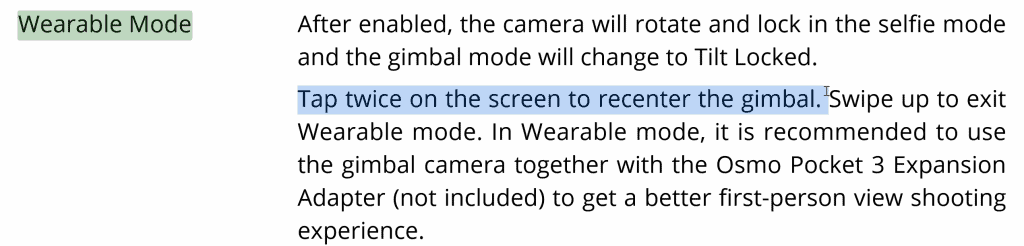
3. Quick Recenter with Double-Tap
Wearable Mode also enables double-tap to recenter the gimbal. So if your framing drifts, just tap twice and the camera snaps back to center. No need to mess with the joystick or dive into the DJI Mimo app mid-ride.
Remember to use the DJI Mimo App
Even with Wearable Mode, it’s smart to check your framing periodically using the DJI Mimo app, especially in the beginning. As you get used to your mounting setup, you’ll find you need to check less and less.
Other Recommended Settings for Biking Footage
Besides Wearable Mode, there are two more camera settings I always adjust when shooting biking footage with the Osmo Pocket 3:
1. Autofocus: Single AF
I strongly recommend switching from Continuous AF to Single AF. Here’s why:
- With Continuous AF, the camera can accidentally lock onto your handlebars, arms, or other objects close to the lens.
- This results in your background (where the real action is) being out of focus.
Instead, use Single AF and tap on an object far in the distance before you start recording. This ensures your footage stays sharp where it matters most.
2. Noise Reduction: Dial It Down to -2
By default, the Pocket 3 applies fairly aggressive noise reduction, which can create unwanted ghosting and blur artifacts in motion-heavy shots especially when shooting in D-Log M.
Setting Noise Reduction to -2 minimizes this in-camera processing, eliminating those strange motion artifacts.
If you do need noise reduction later, it’s better to apply it in post for more control.
Conclusion
And that’s my complete setup and workflow for capturing smooth, cinematic biking footage with the DJI Osmo Pocket 3.
This approach definitely isn’t for everyone, since the Pocket 3 is more delicate than an action camera, and the setup takes a bit of effort. But if you want:
- Natural motion blur
- Better low-light performance
- High quality, gimbal-stabilized shots
…then it’s absolutely worth considering.
I hope this guide gives you some ideas and helps you skip the trial-and-error I went through when figuring this out.