This is a normal video:
And this is a hyperlapse:
If you want to weave smooth, cinematic glides like this into your own videos, Hyperlapse mode on DJI cameras is the tool you need.
I’ve been shooting a lot of hyperlapses recently across all of my handheld DJI cameras. After experimenting with different setups, speeds, and styles, I’ve learned what actually matters and what doesn’t. In this article, I’ll walk through everything from shooting your first hyperlapse, to choosing the right rate setting, tracking subjects, and even adding motion blur for extra impact.
Before we get into the practical side, it helps to clearly understand what a hyperlapse actually is. To do that, we need to start with its foundation: the timelapse.
What Is a Hyperlapse?
In a standard timelapse, the camera captures individual frames at fixed intervals, for example every half second or every two seconds. These frames are then played back at a normal frame rate such as 30 frames per second. The result is compressed time and that familiar fast moving effect often used for clouds, sunsets, or crowds.
A hyperlapse works on the same basic principle, but with one crucial difference. Instead of the camera staying still, the camera itself moves a significant distance during the capture.
Hyperlapse vs Timelapse
At this point, you might be wondering why we even need a dedicated hyperlapse mode. After all, if a hyperlapse is just a timelapse while moving, shouldn’t regular timelapse mode be enough?
There are two main reasons why it isn’t.
Stabilization
Standard timelapse mode assumes the camera is stationary, usually on a tripod, or at most moving slowly on something like a slider. Because of that, no stabilization is applied. If you try to walk around while recording a regular timelapse, the result is often extremely shaky and hard to watch.
Hyperlapse mode, on the other hand, is stabilized by design. Depending on the camera, this is done either using gyro data on cameras like the Osmo Action and Osmo 360, or with a physical gimbal on devices like the Osmo Pocket and Osmo Mobile. This built in stabilization is what makes smooth handheld hyperlapses possible.
Speed Control
Timelapses are usually designed to compress hours or even days into seconds. The shortest selectable interval is often half a second, and much longer intervals are common. That kind of extreme speed up is great for clouds or sunsets, but it does not work well for human scale movement.
Hyperlapses use much gentler speed multipliers such as 2x, 5x, or 10x real time. This keeps motion smooth and readable, whether you are walking through a city or cycling down a street. You avoid the jarring jumps that happen when frames are too far apart.
In short, stabilization and moderate speed up are what make hyperlapse mode ideal whenever the camera itself is moving.
How to Take a Hyperlapse on a DJI Camera
The process is essentially the same across all DJI cameras.
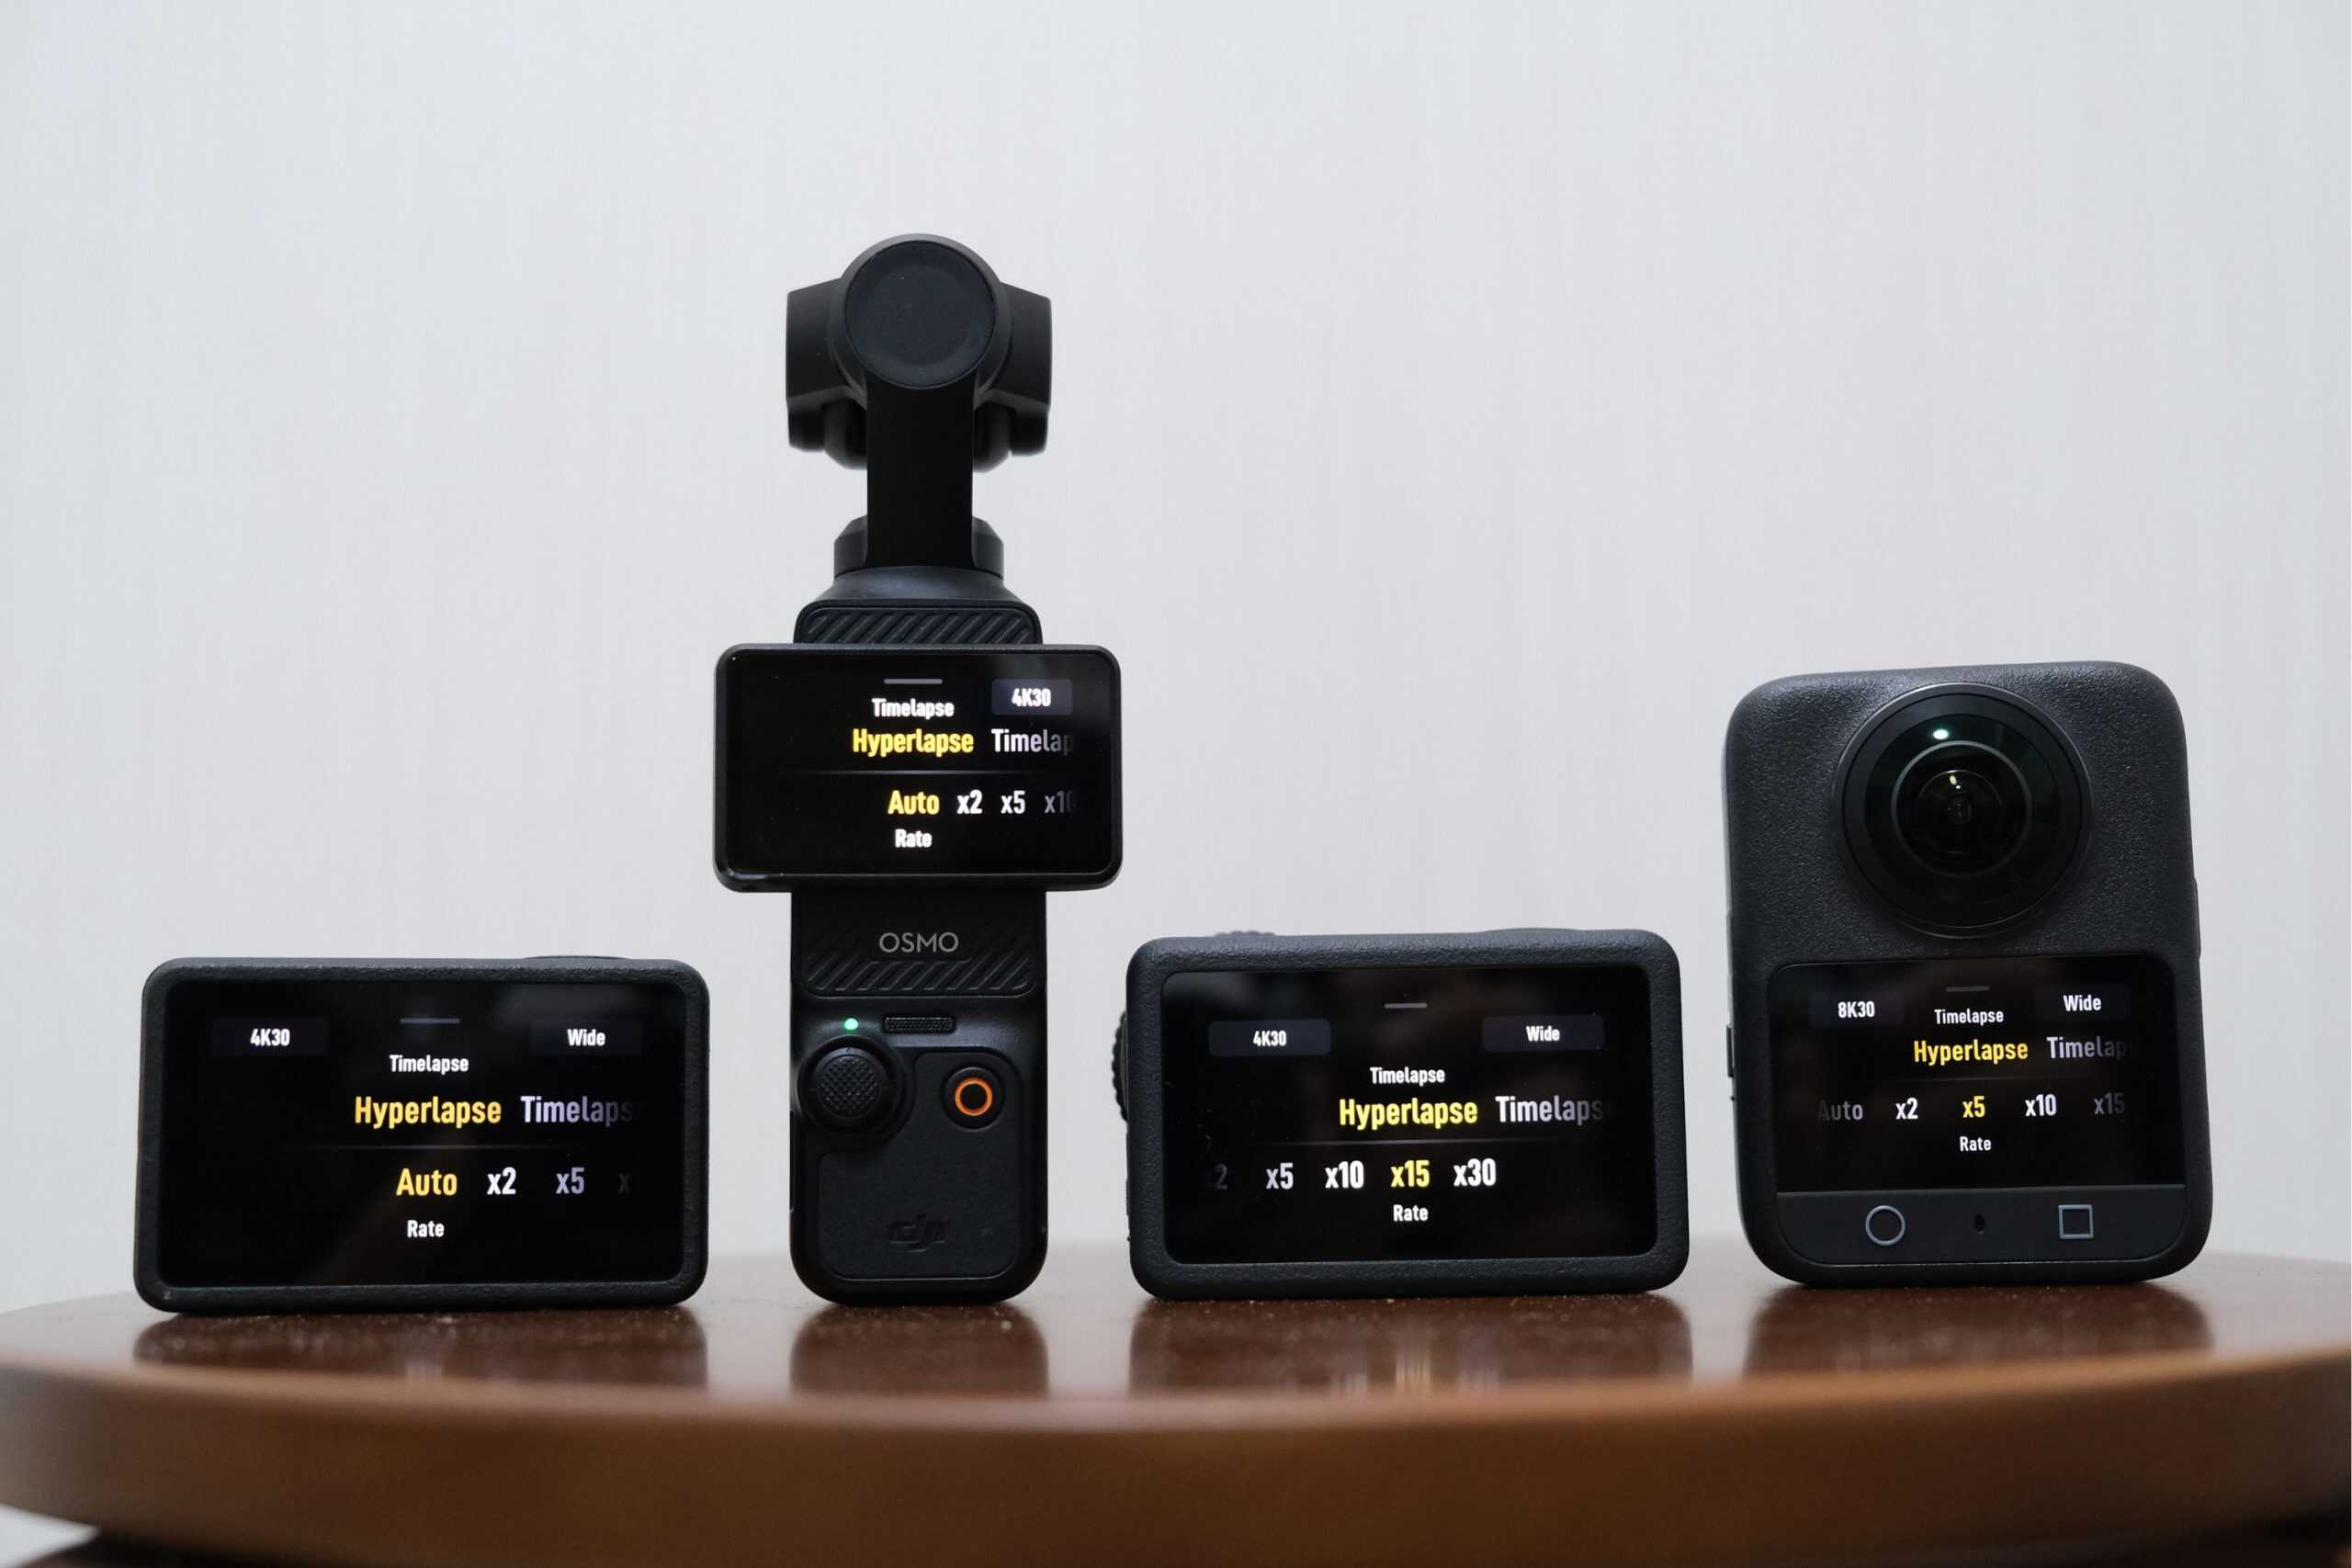
Swipe through the shooting modes until you reach Timelapse, tap into it, and then select Hyperlapse. By default, the rate is set to Auto, which is a good place to start. Once that is set, simply hit record and start moving.
That is all there is to it. You will immediately get a smooth walking hyperlapse without any post processing.
Understanding the Rate Setting
The rate setting is the only hyperlapse specific parameter you can change, and it controls how fast your footage is played back.
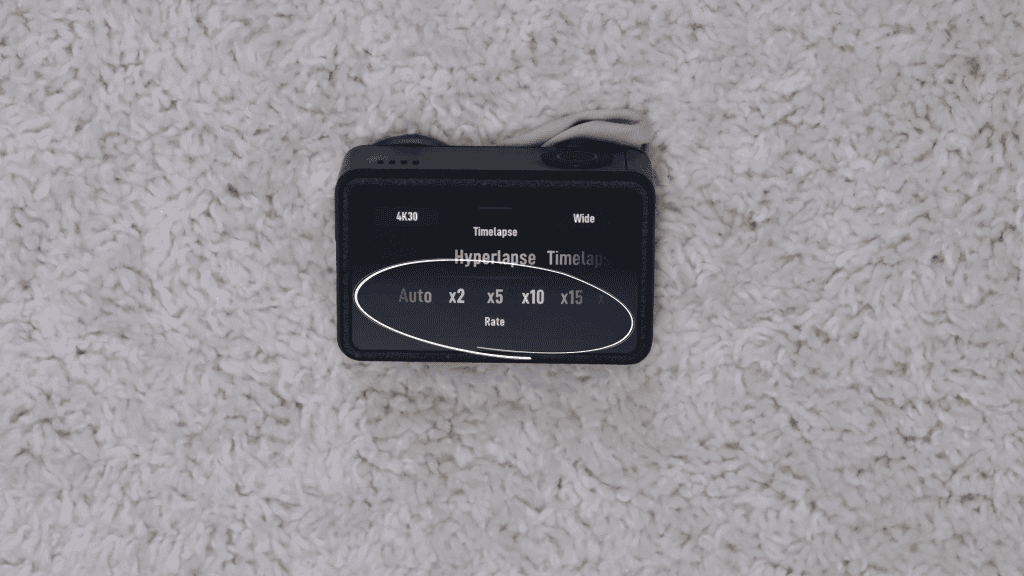
A 2x rate means the footage is played back at twice real time. A 5x rate is five times faster, and so on. You can go all the way up to 30x, which is the maximum selectable rate.
There is also an Auto option, which is the one I personally use most of the time.
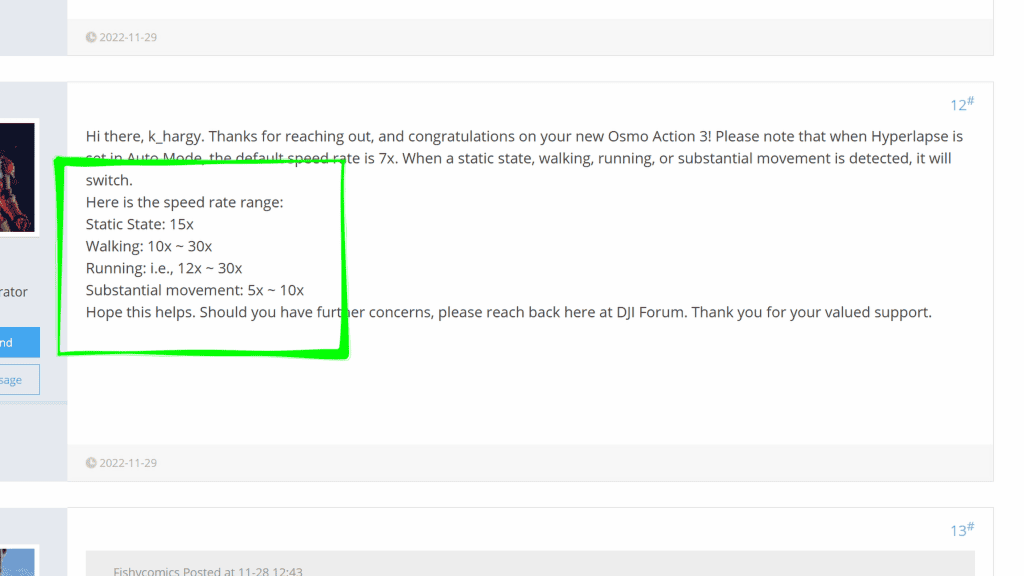
Instead of applying a fixed speed, Auto dynamically adjusts the rate based on how much movement there is. When you slow down or stop, the camera increases the speed. When you move faster, it reduces it. The goal is to make the final result feel smoother and less stop start.
DJI does not publish the exact algorithm behind this, but an older forum reply from a DJI administrator suggests that the rate adapts depending on motion and scene changes like this:
In practice, Auto is the easiest option and works well in most situations. That said, it can sometimes feel a bit too fast, especially in urban cycling shots. In those cases, a fixed rate can give more predictable results.
If you plan to edit in post, using a slower fixed rate such as 2x or 5x gives you the most flexibility. You can always speed footage up later, but slowing it down usually results in choppy motion.
Mixing Hyperlapse and Normal Video
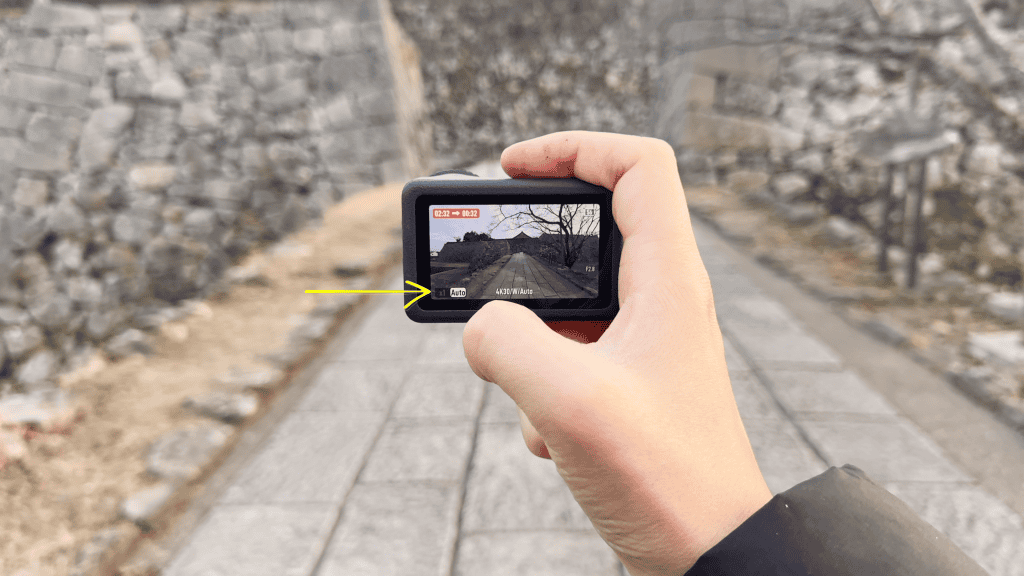
Once you start recording a hyperlapse, you will notice a 1x toggle appear on screen. Tapping this instantly switches the recording to real time video in the middle of the same clip.
This is an extremely powerful storytelling tool. You can use hyperlapse to cover travel from point A to point B, then switch to normal speed for key moments, and then jump back into fast motion again.
When you switch to 1x, full audio recording also resumes, which is useful for ambience or commentary. Everything is stitched together in camera, so you end up with a single ready to use video file.
One important limitation to note is that this 1x toggle feature is not currently available on the Osmo 360.
Subject Tracking Hyperlapses
So far, everything we have looked at involves pointing the camera forward and moving through space. Another popular technique is locking the camera onto a subject so the environment moves around it.
How you do this depends on the camera you are using.
On gimbal based cameras like the Osmo Pocket 3, or phones mounted on the Osmo Mobile, you can use DJI’s ActiveTrack feature. On the Osmo Pocket 3, you double tap the subject. On the Osmo Mobile, you draw a box around it.
ActiveTrack makes subject locked hyperlapses very easy, but it is not perfect. If something passes between you and the subject, the camera can lose the lock and end the shot early. This has happened to me more times than I would like.
On non gimbal cameras like the Osmo Action, subject tracking has to be done manually by keeping the camera pointed at the subject as you move. While this requires more effort, it can actually be more reliable since there is no risk of the camera losing tracking.
The most flexible option of all is the Osmo 360. Because it captures everything around you, you can decide how to track and reframe the hyperlapse later in post production.
Adding Motion Blur
Motion blur can add a strong sense of speed and smoothness to a hyperlapse, but it comes with some challenges.
True motion blur requires a slower shutter speed. With handheld hyperlapses, this can cause smearing and other artifacts because of heavy electronic image stabilization happening behind the scenes.
On top of that, the slowest shutter speed available in hyperlapse mode is 1/30 of a second. While that adds some blur, it is often not enough to create the dramatic sense of speed that hyperlapses imply.
Because of this, I usually add motion blur in post. This avoids stabilization issues and removes the need to juggle manual exposure or ND filters while shooting.
Interestingly, I have been using Insta360 Studio’s Motion ND effect for this. DJI Studio has recently added artificial motion blur as well, but it is currently limited to Apple silicon Macs or newer iPhones, which does not help if you are editing on Windows.
Fake motion blur can easily look unnatural, so it is best used sparingly and only when it genuinely improves the shot.
Is a Hyperlapse Just a Sped Up Video?
After all of this, you might ask whether hyperlapse mode is even necessary. Could you not just shoot normal stabilized video and speed it up in post?
In practice, yes. If you are already shooting stabilized footage, speeding it up will give you a very similar result. Hyperlapse mode does not appear to use a fundamentally different stabilization system than regular video.
That said, hyperlapse mode still has real advantages. It saves storage space, gives you a finished result straight out of the camera, and when using Auto rate, it creates smooth speed changes that would otherwise require manual speed ramping in post.
For long distances or long recording times, hyperlapse mode makes a lot of sense. Storage efficiency alone can be a deciding factor.
For shorter clips where maximum control is important, shooting normal video may be the better option. You gain finer control over timing in post, and if you shoot at 60 frames per second, you can even mix in slow motion when it fits the story.