So you’ve picked up an Osmo Action 6 and want to start shooting timelapses. Those short, mesmerizing clips that compress minutes or even hours into just a few seconds of motion. This guide walks you through everything you need to know to get started, from your very first timelapse to more advanced techniques that dramatically change the look of your footage.
We’ll begin with the basics: capturing a simple timelapse using the camera’s built-in mode. From there, we’ll look at how adjusting key settings like interval and shutter speed affects motion, pacing, and image quality. Finally, I’ll share a handful of practical tips, including when it makes sense to shoot in RAW and how to add movement to otherwise static shots.
Before touching the camera, though, it’s worth making sure we’re clear on what a timelapse actually is.
What a Timelapse Really Is
At its core, a timelapse is a sequence of individual photos taken at regular intervals. When those frames are played back at a normal video frame rate, usually 24 or 30 frames per second, time appears to speed up. Clouds streak across the sky, traffic turns into flowing ribbons of light, and people move through the frame with an almost surreal urgency.
On older cameras, creating a timelapse meant manually stitching hundreds or thousands of photos together in post. Thankfully, the Osmo Action 6 simplifies the entire process. Its dedicated Timelapse mode captures the individual frames and automatically compiles them into a finished MP4 video, ready to watch or edit.

The only essential accessory you’ll need is something to keep the camera perfectly still. A tripod is ideal, but any stable surface can work if it won’t move during the capture. A table, a ledge, or even the ground can do the job as long as the camera stays locked in place.
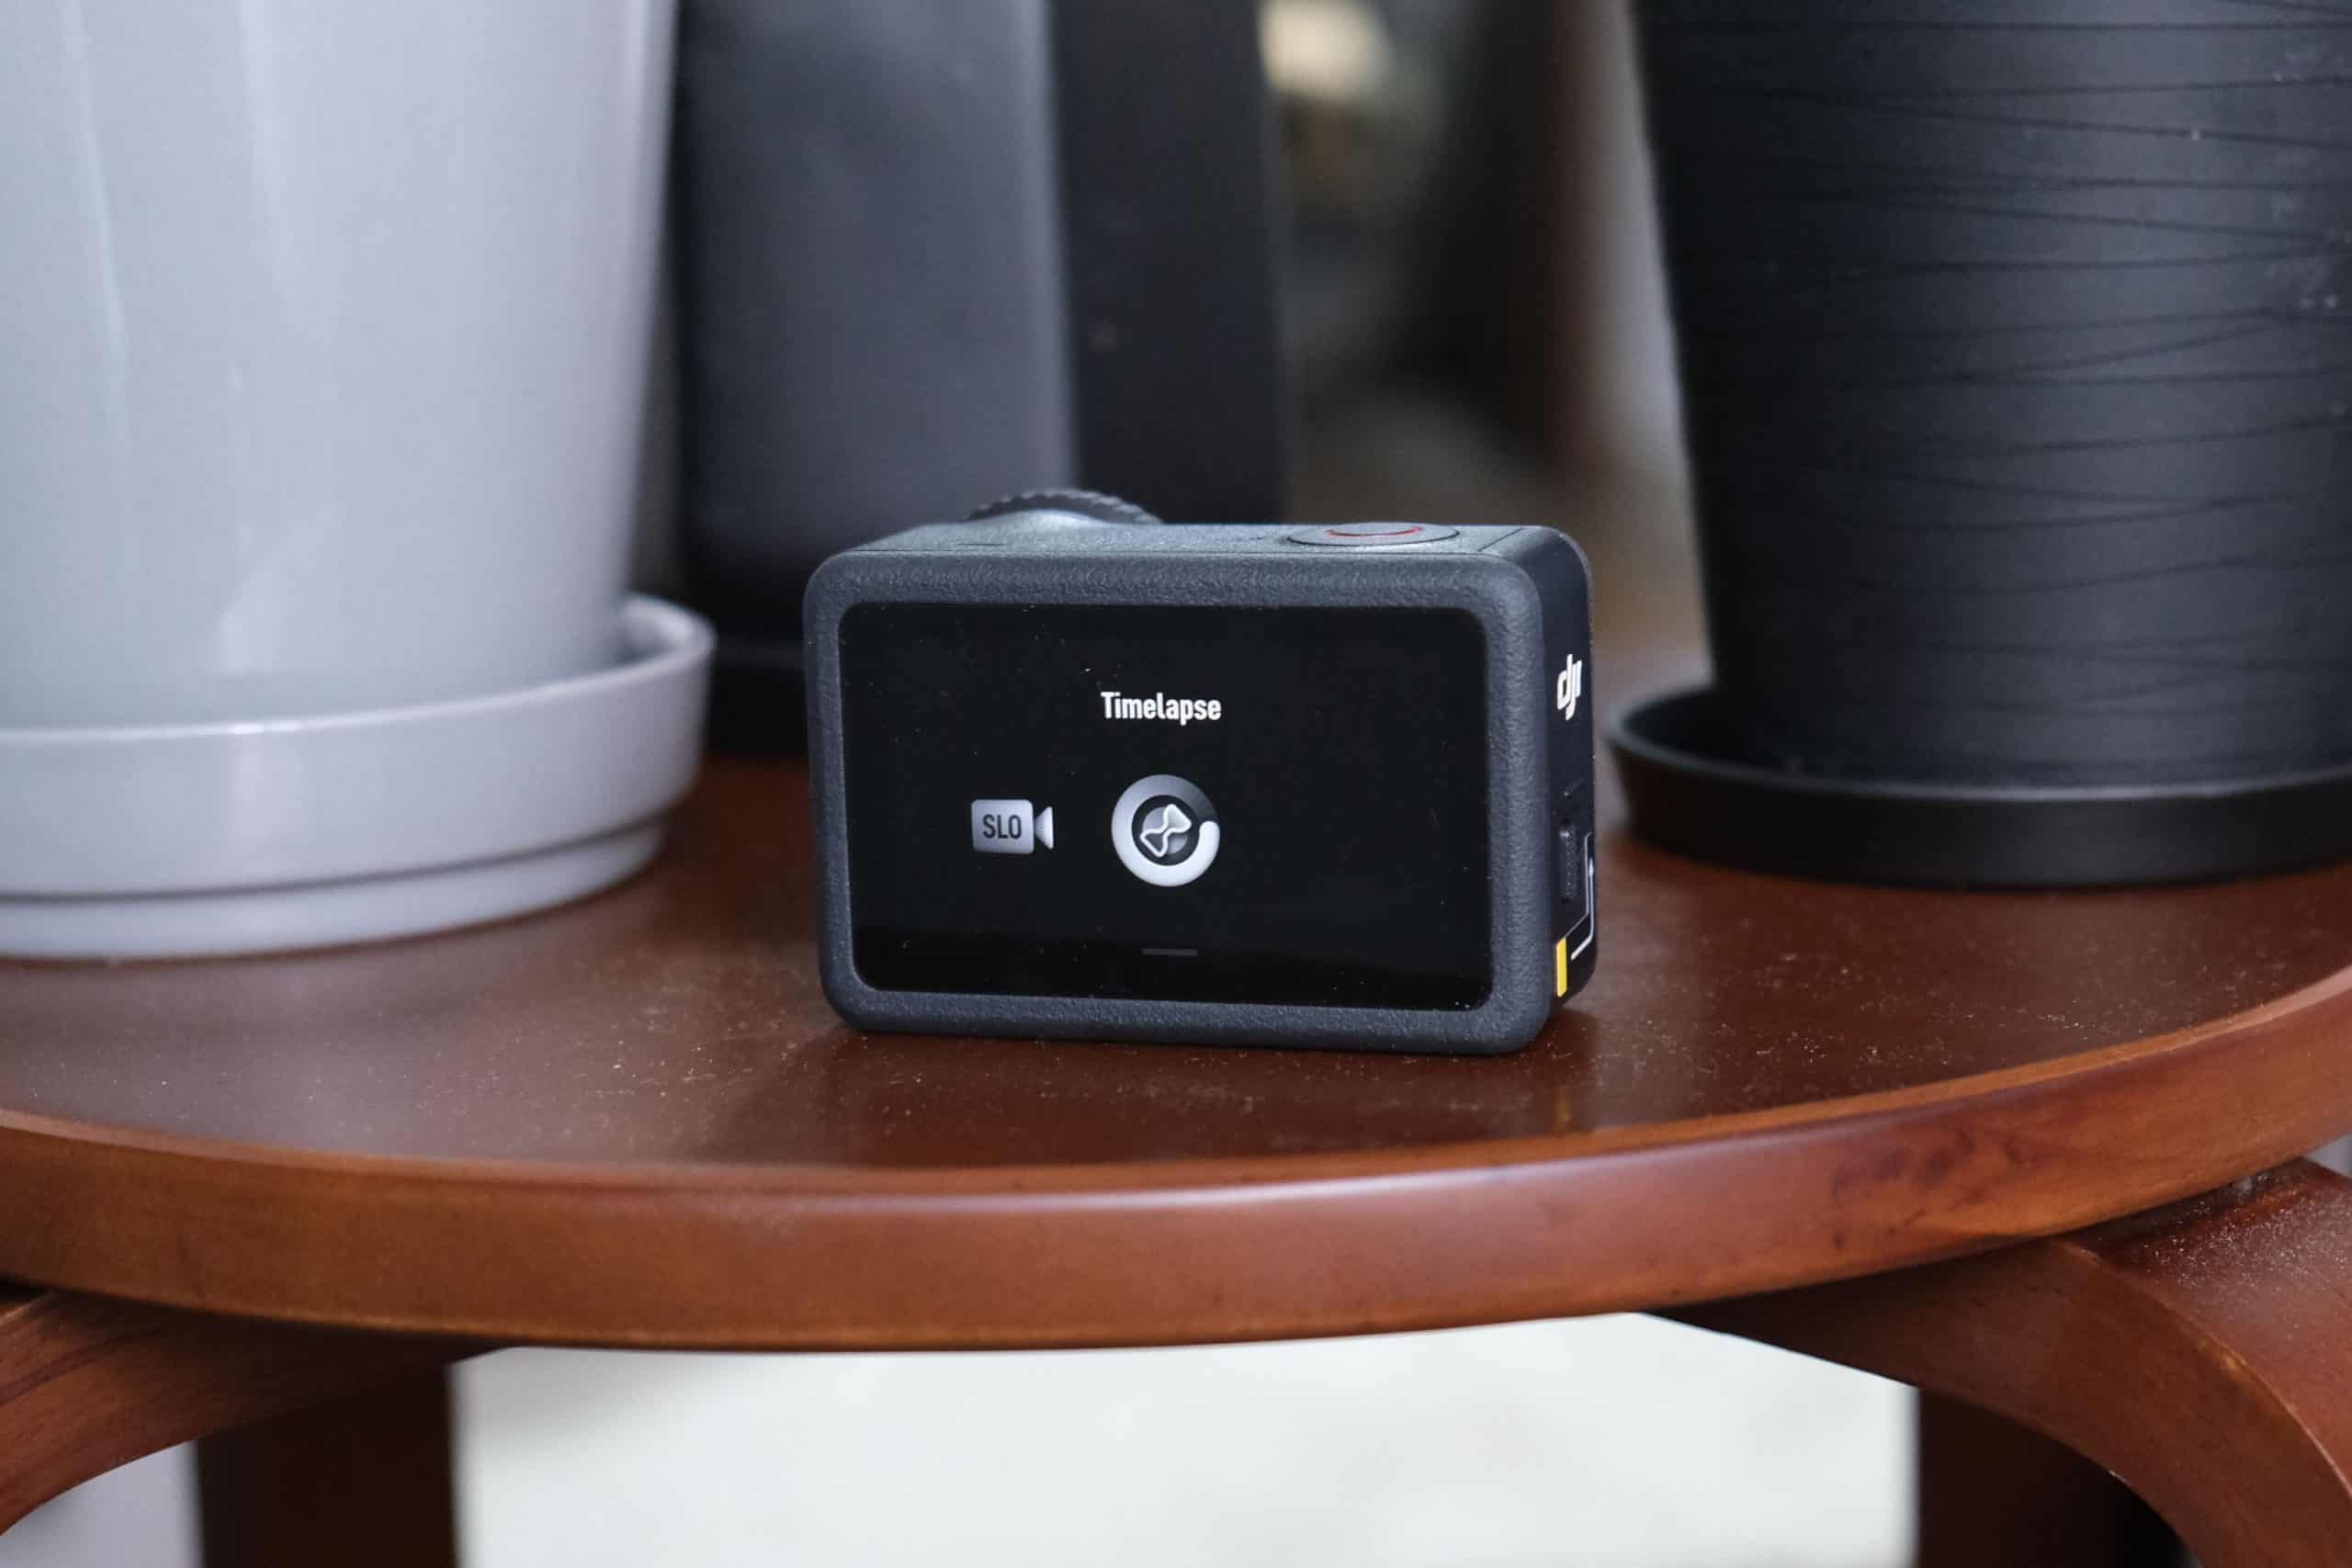
Using Timelapse Mode on the Osmo Action 6
To access Timelapse mode, tap the shooting mode icon in the bottom-left corner of the screen and swipe until you reach the final mode in the list, timelapse. Once you’re there, swipe up from the bottom to open the settings menu.
The first thing to change is resolution. The camera defaults to 1080p, but for best results you’ll almost always want to switch to 4K. The extra resolution gives you a cleaner image and more flexibility if you crop or stabilize in post.
Next is field of view. Wide captures the most of the scene but introduces noticeable edge distortion. Natural Wide reduces that fisheye effect while keeping a broad perspective. Standard gives you the straightest lines, but also the narrowest view. Which one you choose depends on the scene, but Natural Wide is often a good balance.
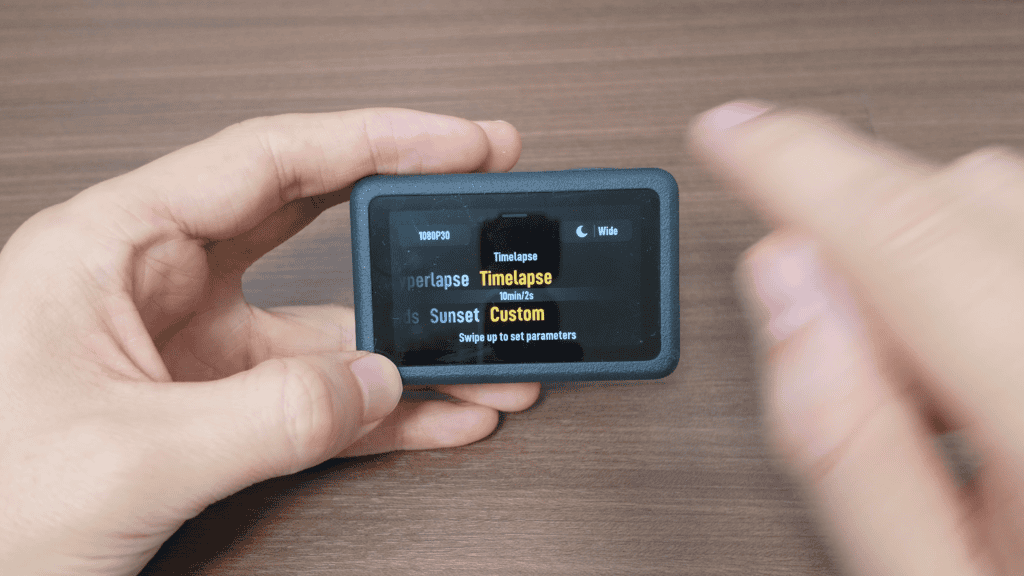
Timelapse mode also includes a few settings you won’t see elsewhere. One of them is Hyperlapse, which is essentially a timelapse captured while the camera is moving. Hyperlapses can look fantastic, but they introduce additional variables, so for now it’s best to stick with a standard, locked-off timelapse.
Related: DJI Hyperlapse Guide
You’ll also see scene presets labeled Crowds, Clouds, and Sunset. These presets don’t change color, exposure, or image processing. All they do is select an interval and a duration for you. Because of that, there’s no real reason to rely on them. Using Custom mode and choosing your own settings is the fastest way to get more confident shooting timelapses in any situation.

Capturing Your First Timelapse
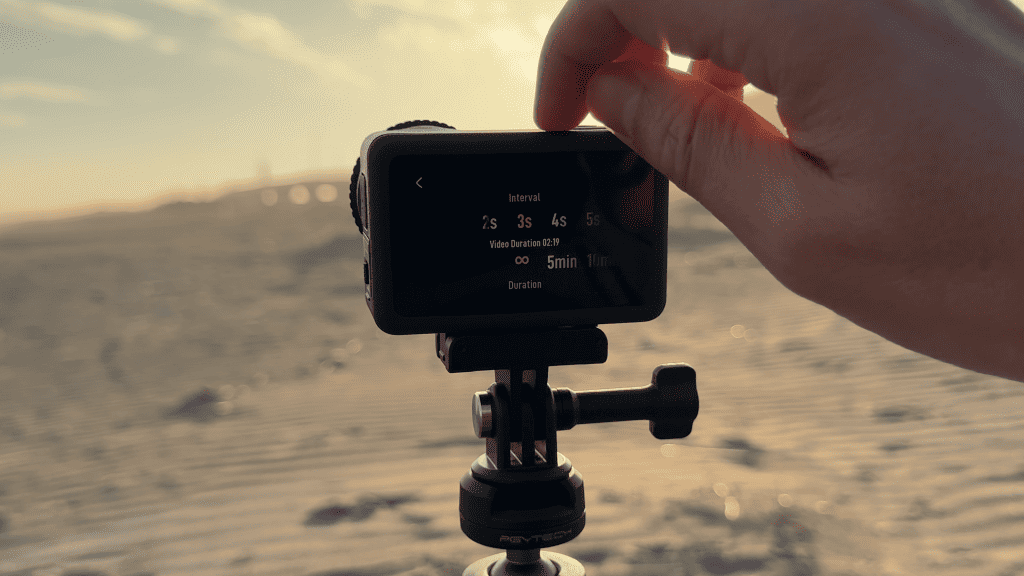
As a simple starting point, imagine you’re shooting a sunset. A three-second interval works well here, since the light changes slowly and you want that change to be noticeable. Instead of setting a fixed duration, you can choose Infinity, which tells the camera to keep shooting until you stop it manually.
Once everything is set, press record and let the camera do its thing. This is often the hardest part of timelapse photography: waiting. After some time has passed and you’re happy with what you’ve captured, stop the recording and review the result. Even a basic setup can produce a surprisingly polished timelapse.
With that first shot out of the way, it’s time to talk about the setting that has the biggest impact on how motion looks.
Choosing the Right Interval
Interval determines how much time passes between each captured frame, and it completely changes how movement is perceived.
Fast-moving subjects need short intervals. Crowds, traffic, and busy streets look smoother and more readable when frames are captured frequently. If the interval is too long, people and cars appear to jump across the frame rather than flow through it.
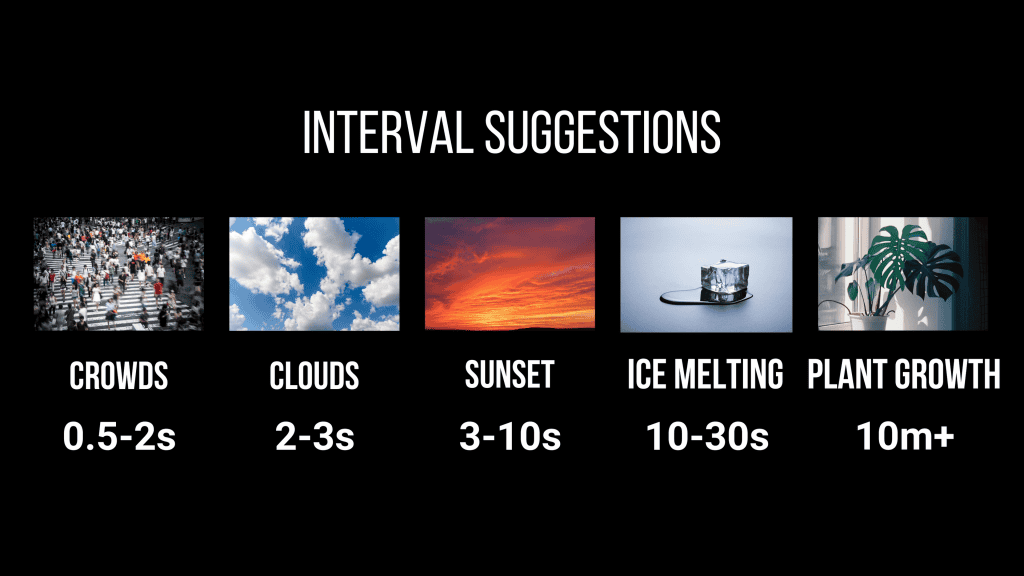
Slower subjects benefit from longer intervals. Clouds, sunsets, and changing light often look more dramatic when time is compressed more aggressively. For extremely slow processes, like plants growing or stars moving across the sky, very long intervals are essential or the motion will be almost imperceptible.
In practice, this means there’s no single “correct” interval. It depends entirely on how fast the scene is changing and how much motion you want to emphasize.
There’s also an important rule worth remembering. If you shoot with a shorter interval, you can always speed the timelapse up later by discarding frames. If you shoot with an interval that’s too long, you’re stuck. You can’t create frames that were never captured, and slowing the footage down usually looks unnatural. When in doubt, err on the side of a shorter interval, as long as you’re okay with the increased storage usage.
Using Shutter Speed to Control Motion Blur
Shutter speed is another setting that dramatically affects the look of a timelapse. Faster shutter speeds freeze motion, resulting in a sharp but often jittery appearance. Slower shutter speeds introduce motion blur, creating smooth trails that feel more cinematic.
To control shutter speed manually, you’ll need to enable Pro mode. Open the settings panel, turn Pro mode on, then switch exposure from Auto to Manual. From there, you can choose your shutter speed directly.
A relatively fast shutter, like 1/30, doesn’t give the sensor much time to gather light. The camera compensates by raising ISO, which often leads to heavy noise, especially in low light. Slowing the shutter to something like 1/5 allows the ISO to drop significantly, improving image quality and introducing subtle motion blur.
Once you reach shutter speeds of one second or longer, motion blur becomes very pronounced and image quality improves even further. At that point, though, you’ll need to make sure your interval is longer than your shutter speed. The camera won’t allow a two-second interval with a three-second shutter, for example.
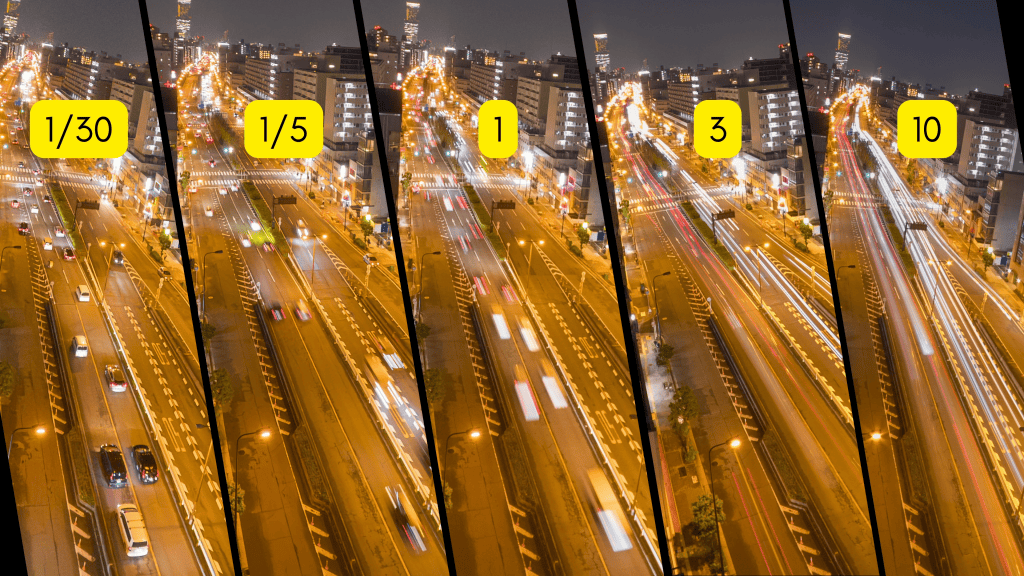
The trade-off is that longer shutters often force longer intervals, which makes the scene appear to move faster overall. That isn’t necessarily a problem, but it’s something to be aware of when balancing motion blur against pacing.
In bright daylight, slow shutter speeds are difficult to use without overexposing the image. This is where ND filters come in. They reduce the amount of light hitting the sensor, allowing you to use longer shutters even in strong sunlight. Strong ND filters are often necessary, especially if you’re aiming for multi-second exposures during the day.
Practical Tips for Better Timelapses
One of the most important things to manage is ISO. High ISO levels quickly destroy image quality, especially in timelapses where noise accumulates across frames. Limiting the ISO range to something sensible, such as 100 to 800 or 100 to 1600, prevents the camera from jumping to extreme values. If you’re setting exposure manually, aiming for an exposure somewhere between slightly underexposed and slightly overexposed is usually sufficient.
Another useful option is recording in Video plus RAW. This saves a finished video file alongside individual RAW DNG frames. The advantages are significant. You can recover more detail from shadows, apply more flexible color grading, and use powerful photo-based noise reduction tools that simply aren’t available with compressed video.
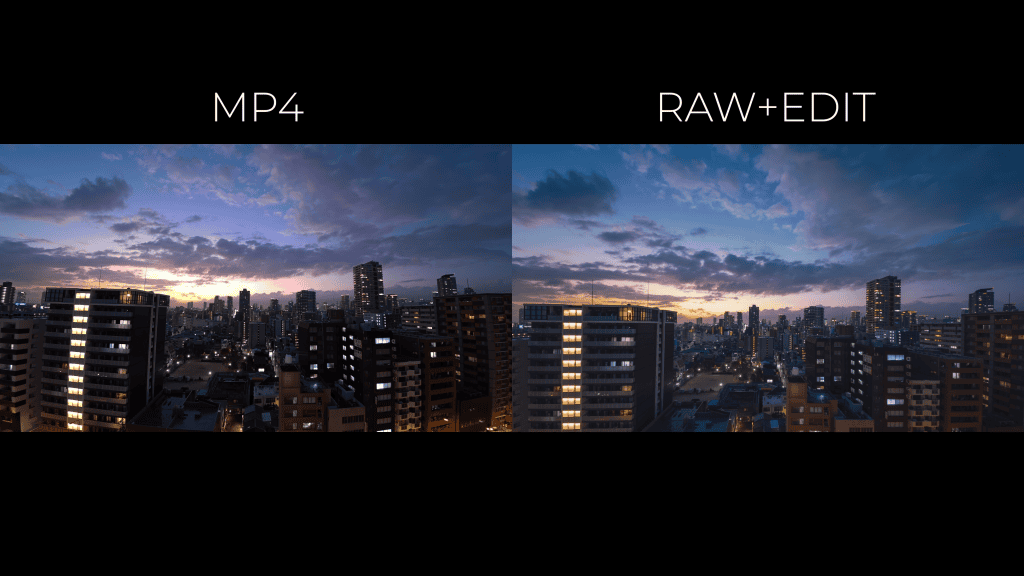
The downside is time and storage. RAW files consume a lot of space, and processing them takes effort. There’s also a technical limitation: when shooting Video plus RAW, the minimum interval increases to two seconds. For that reason, it’s often best to use RAW selectively, especially for important or difficult shots like night timelapses.
Finally, consider adding movement. Static timelapses can look great, but subtle motion makes them feel more alive. Traditionally this requires sliders or motorized heads, but with the Osmo Action 6’s wide image, you can often fake movement in post. Simple pans, push-ins, or gentle reframing can add energy without complicating the capture process.
Final Thoughts
Timelapses with the Osmo Action 6 are straightforward to get started with, but the real magic comes from understanding how interval, shutter speed, and exposure work together. Once you get comfortable adjusting those settings, you can shape time in ways that fit your scene rather than relying on presets.
With a stable setup, a bit of patience, and some experimentation, you’ll be able to capture timelapses that look intentional, cinematic, and far more polished than you might expect from such a small camera.