
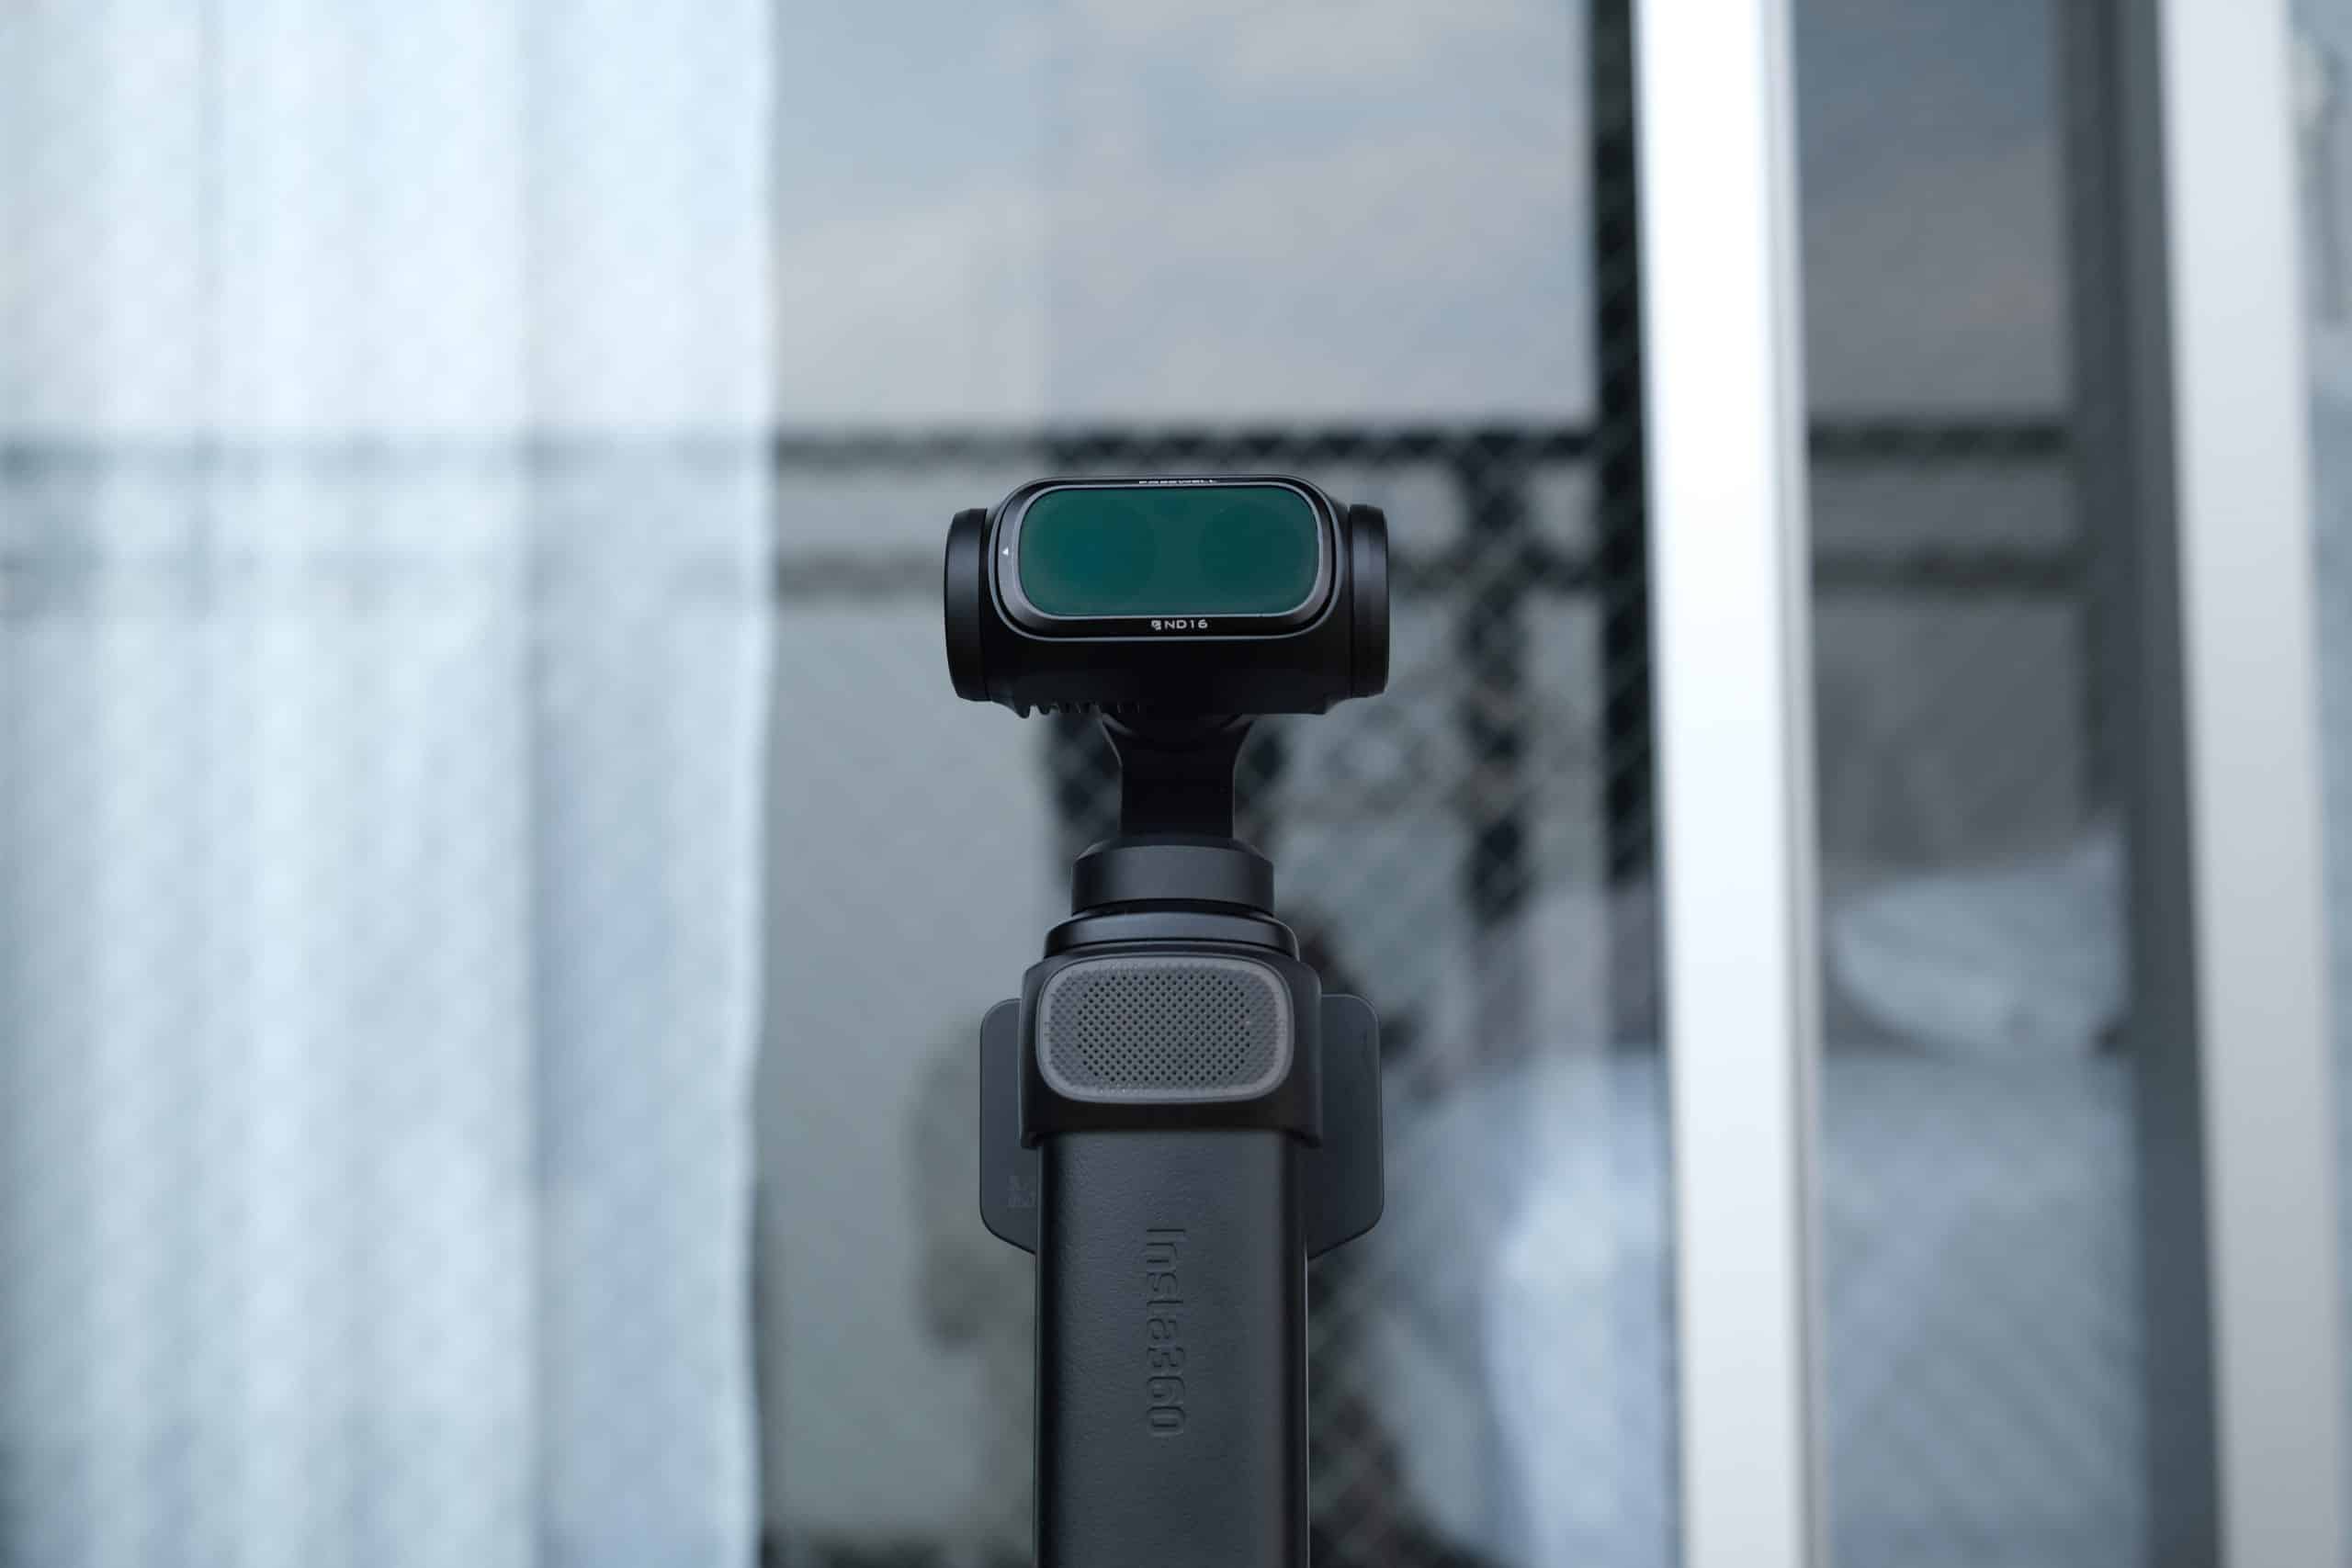
There are plenty of lens filters available for the Insta360 Luna Ultra, but if I could only carry one type, it would be ND filters.
They may seem like a fairly simple accessory, but ND filters can fundamentally change the way movement is rendered in your footage. Used in the right situations, they can make motion feel smoother, more natural and more cinematic, in a way that is extremely difficult to convincingly recreate in post.
In this guide, I’ll cover:
- Why you might want to use ND filters
- When motion blur is actually worth pursuing
- How to use ND filters on the Luna Ultra
- Which ND strengths are most useful
- What to look for when choosing a filter set
For this guide, I tested:
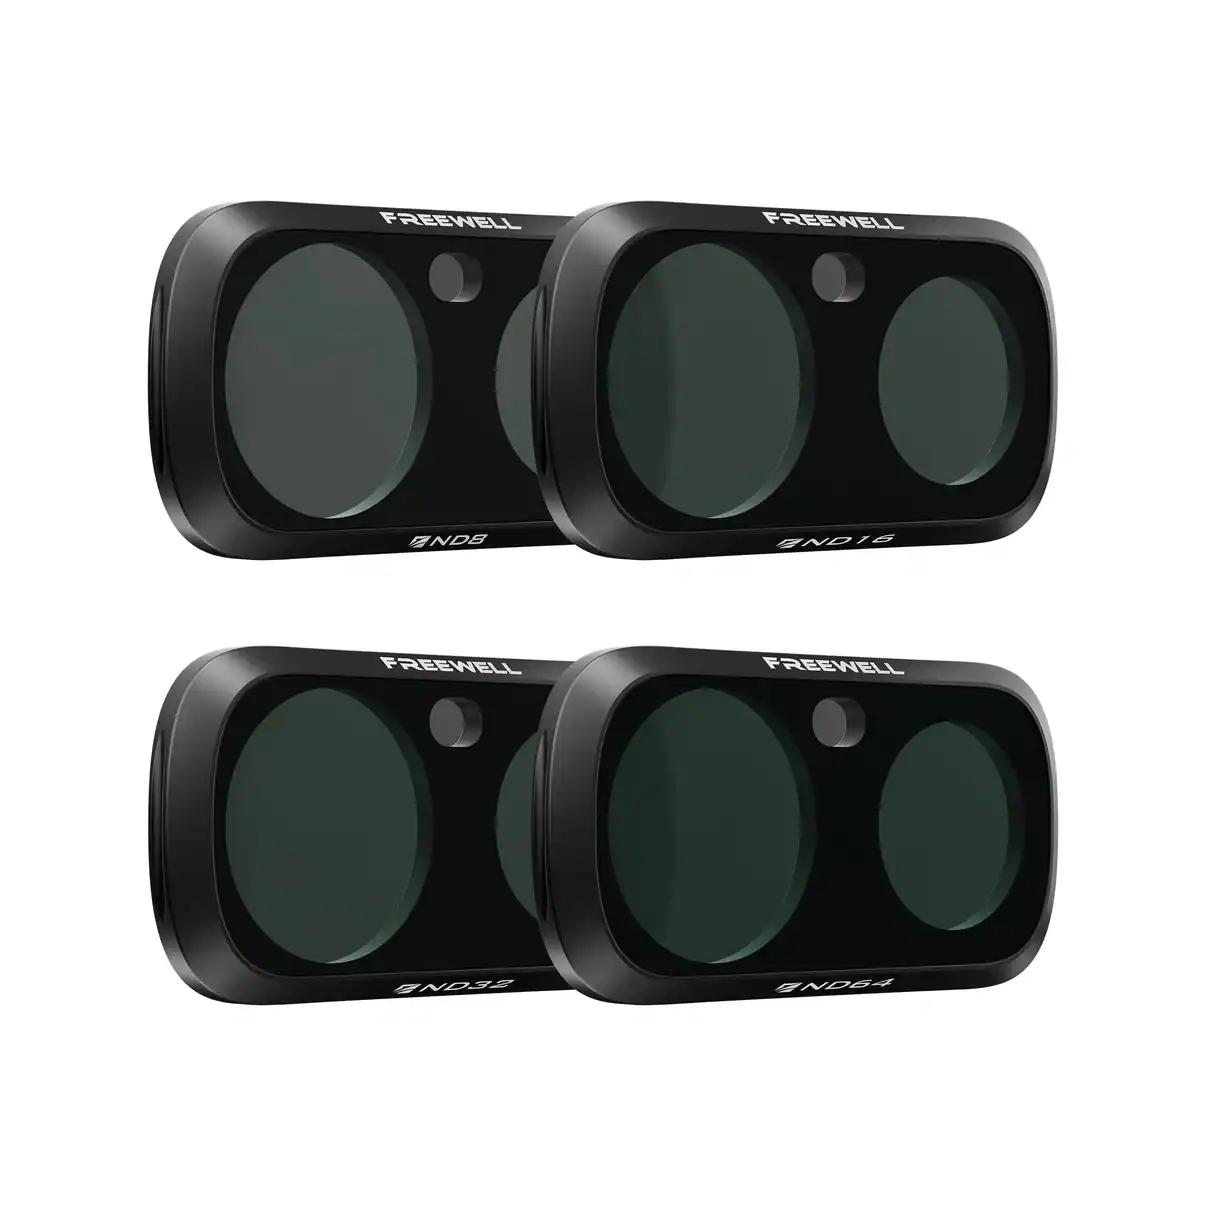
Freewell ND Filters for Insta360 Luna Ultra
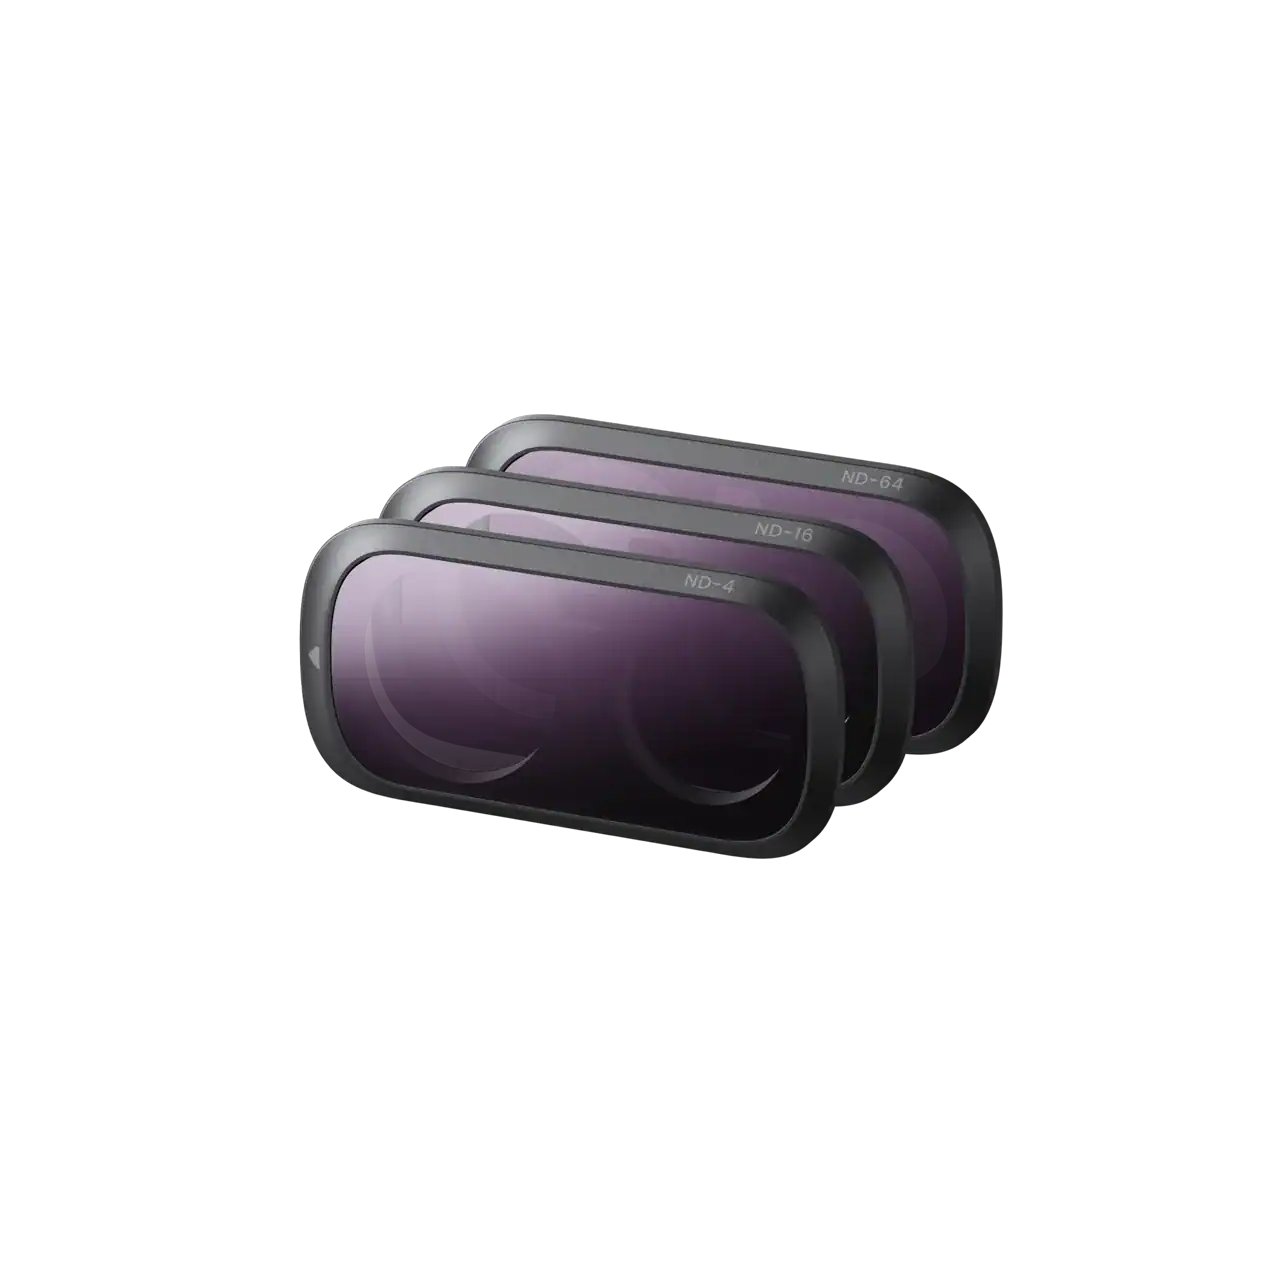
Insta360 Luna Ultra ND Filters
Why Use ND Filters?
The main reason to use an ND filter for video is motion blur.
Video is essentially a sequence of still images played back in rapid succession. If every individual frame is extremely sharp, movement can look harsh or choppy. Allowing a small amount of motion blur into each frame helps visually bridge movement from one frame to the next, making it appear smoother and more fluid during playback.
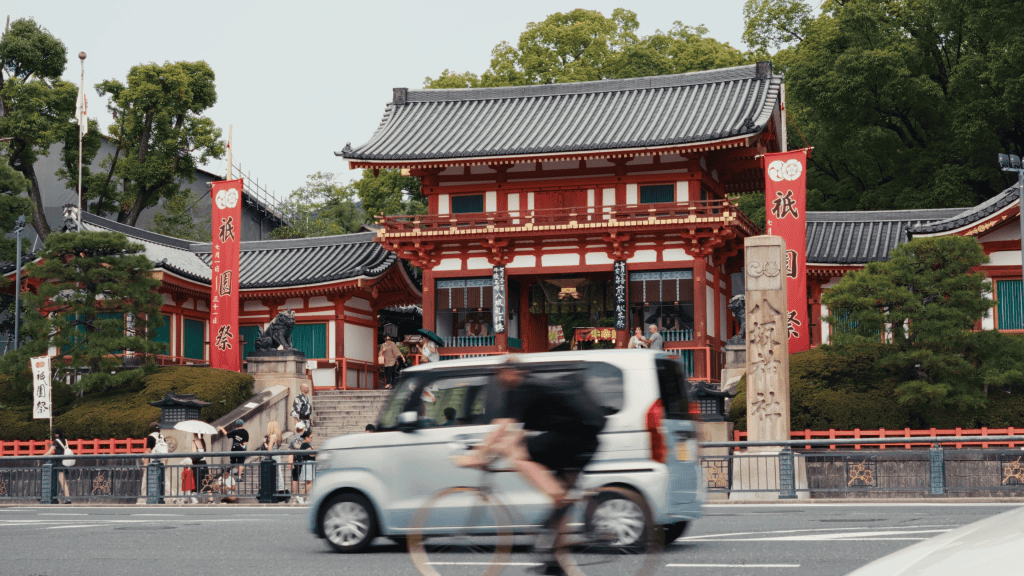
It’s also the way motion is commonly rendered in movies and high-end TV productions, which is one reason we tend to associate this type of movement with a more cinematic look.
Shutter Speed and Motion Blur
To create motion blur, you need to use a slower shutter speed. This allows each frame to capture movement over a longer period of time.
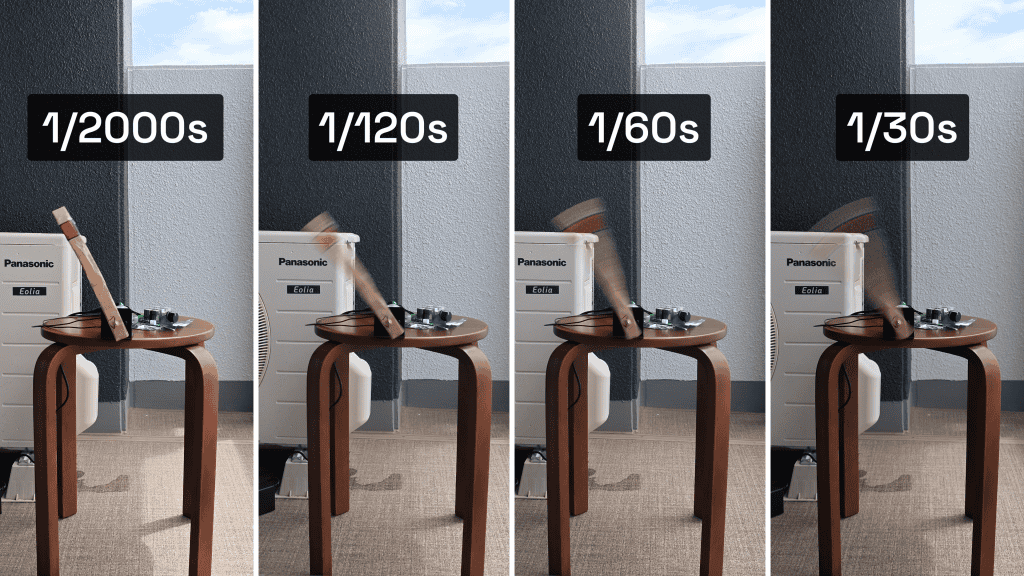
The downside is that a slower shutter speed also lets more light reach the sensor.
In low light, that isn’t necessarily a problem. But during the day, slowing your shutter to something like 1/60 second will often make the image far too bright.
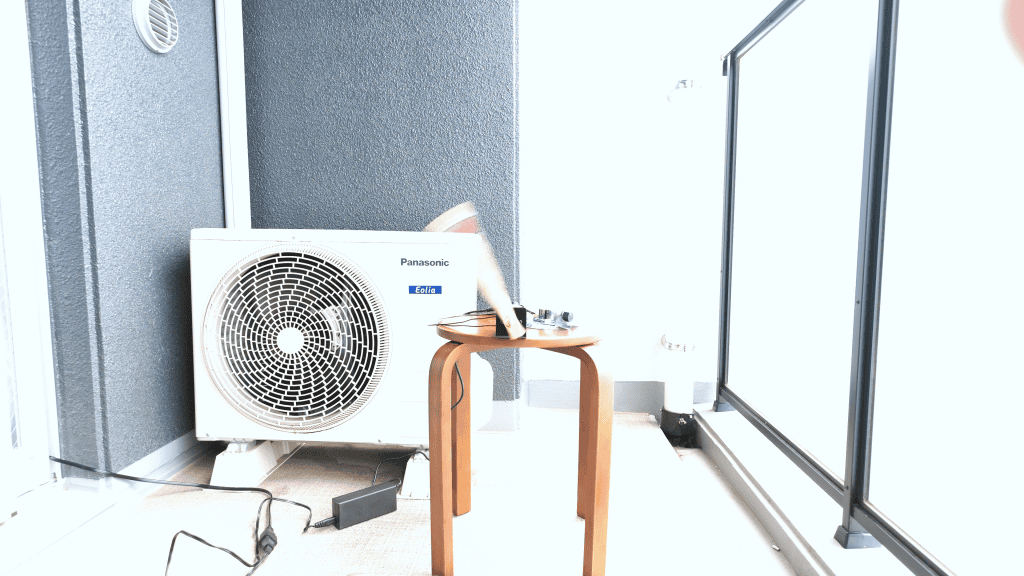
That is where an ND filter comes in.
A neutral density filter is essentially sunglasses for your camera. It reduces the amount of light entering the lens without requiring you to change your chosen shutter speed.
Importantly, the ND filter itself does not create motion blur. It simply gives you enough control over exposure to use the shutter speed that does.
Can You Just Add Motion Blur in Post?
There are tools that attempt to simulate motion blur during editing, but in my experience they still don’t look as natural as genuine motion blur captured in-camera.
Because the software has to estimate how objects are moving between frames, artificial motion blur can also introduce fairly obvious artifacts (particularly around complex edges or fast movement).
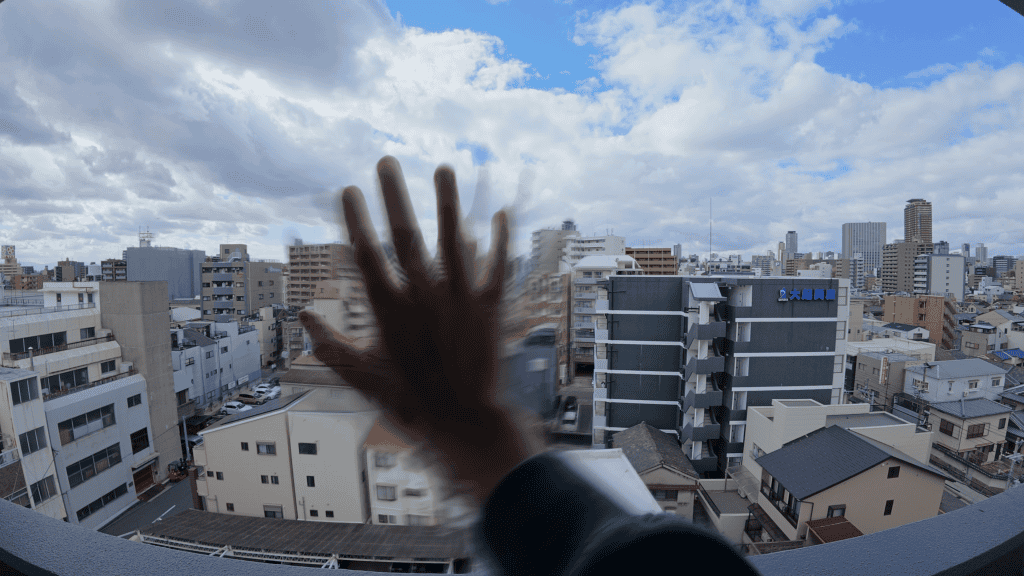
There are situations where I can understand relying on post-production instead. On electronically stabilized action cameras, for example, slow shutter speeds can sometimes cause unpleasant smearing or jitter because the EIS works best with relatively sharp individual frames.
The Luna Ultra doesn’t have that problem, because its stabilization is achieved by a mechanical gimbal. That makes the Luna Ultra particularly well suited to ND filters, and in my opinion is one of the biggest advantages of these pocket gimbal cameras over other handheld cameras.
When Should You Use an ND Filter?
If you have already decided that you want to shoot at a particular shutter speed, the practical answer is simple:
Use an ND filter whenever the scene is too bright to maintain the shutter speed you want.
The more interesting question is whether you actually want motion blur in the first place.
Despite how often ND filters are discussed in filmmaking circles, they are definitely not essential for every kind of video.
For example, I talk about ND filters all the time on my YouTube channel, but I usually don’t bother using them for product reviews or talking-head clips.
They introduce an extra step into the shooting process, and for everyday content I often prefer a more conventional, casual video look rather than something deliberately cinematic.
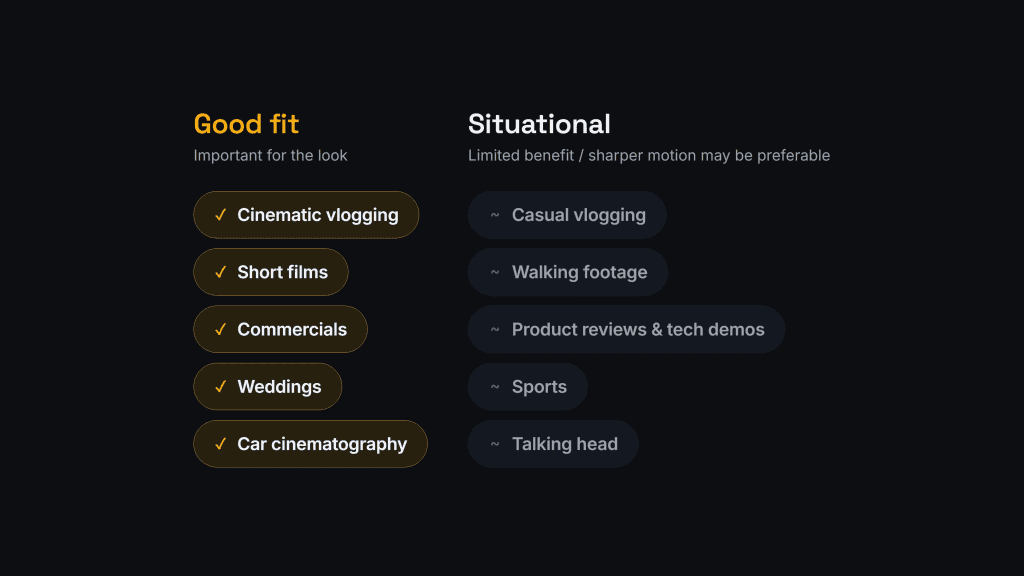
However, when I’m travelling, I usually want to come home with footage that I can turn into something more filmic. In those situations, I use ND filters much more often because natural motion blur is a big element of the traditional ‘cinematic’ look.
Ultimately, motion blur is a creative choice rather than a technical requirement.
Neither approach is inherently better. It depends on the kind of footage you want to create.
Motion Blur Can Also Be a Practical Tool
Motion blur isn’t only about making footage look more cinematic.
It can also help with certain transitions and editing techniques. Fast whip pans, for example, can create enough blur to hide a cut between two different locations. Similar techniques can be used for seamless wipes between scenes.
I don’t use these particularly often, but they are good examples of motion blur serving a practical purpose rather than simply changing the aesthetic and vibe of the footage.
How to Use ND Filters on the Luna Ultra
Using an ND filter is actually very straightforward once you understand the basic process.
The first thing to decide is your shutter speed.
After all, maintaining that shutter speed is the main reason we’re using an ND filter in the first place.
Start With the 180-Degree Shutter Rule
For a natural-looking amount of motion blur, a good default is the 180-degree shutter rule.
In simple terms, this means using a shutter speed of roughly double your frame rate:
| Frame Rate | Typical Shutter Speed |
|---|---|
| 24fps | 1/48 or 1/50 sec |
| 25fps | 1/50 sec |
| 30fps | 1/60 sec |
| 60fps | 1/120 sec |
So if I’m recording at 30fps, I’ll normally start by locking the Luna Ultra to 1/60 second.
To do that, swipe in from the right side of the screen, open the exposure controls and manually set the shutter speed.
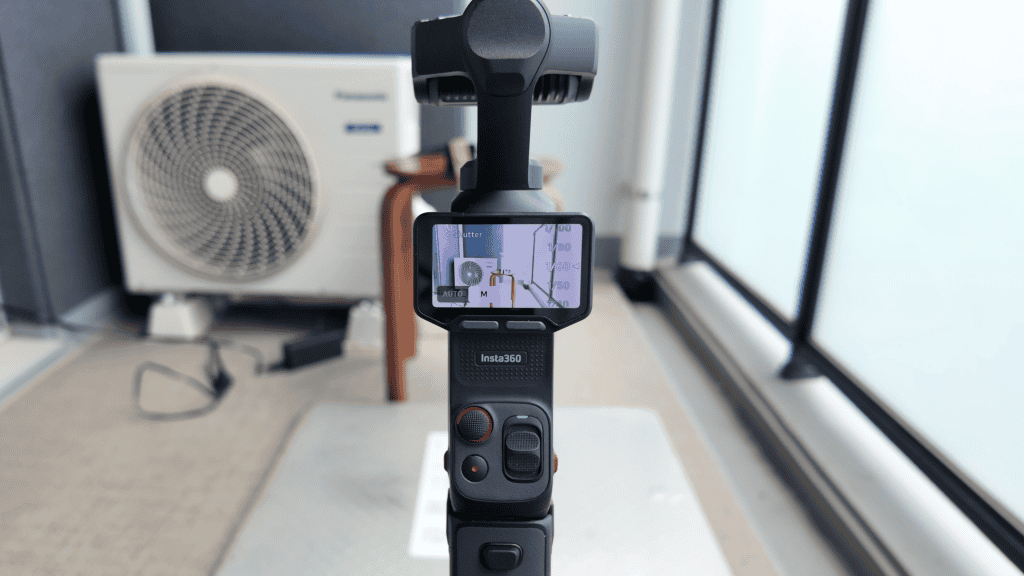
In daylight, the image will probably become heavily overexposed.
Now we can add the ND filter.
Which ND Strength Should You Use?
The correct strength depends entirely on how much light is available.
As a rough starting point:
- ND16: softer daylight or overcast conditions
- ND32: bright daylight or situations where you’re outside but not necessarily in direct sun
- ND64: strong direct sunlight
These aren’t rigid rules. The exact filter you need will change depending on your chosen shutter speed, ISO, picture profile and the brightness of the scene.
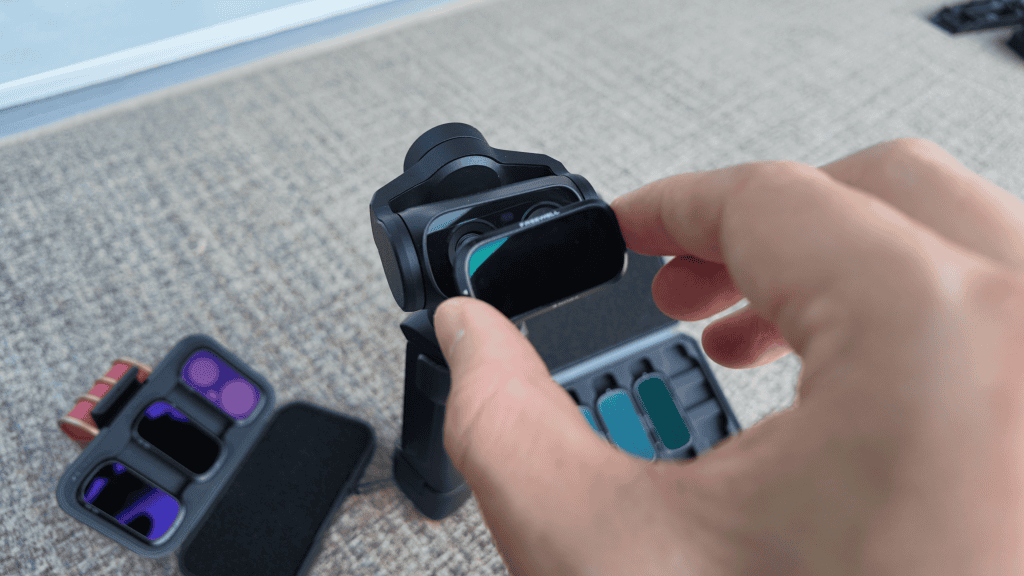
On a bright day in open shade, for example, I often find an ND32 to be a useful starting point. In strong summer sunlight, ND64 can become necessary.
The Luna Ultra’s filters simply attach magnetically to the lens, so switching between them only takes a few seconds.
Auto ISO or Manual ISO?
You can leave ISO on Auto while using an ND filter, or control it manually.
For simplicity, Auto ISO works well enough for many situations: lock your shutter speed, attach an appropriate ND filter and allow the camera to make the final exposure adjustment through ISO.
However, unlike on my DJI Osmo Pocket 3 and 4, where I defaulted to auto ISO, for the timebeing I’m using manual ISO, because I have no idea what ISO the camera is actually using in this mode. This means I might be shooting at a high ISO like 3200 without knowing it, because the Luna Ultra does not give you this information.
Furthermore…
The Luna Ultra Really Needs a Live EV Readout
One frustration with the Luna Ultra is that it currently lacks a live exposure-value readout.
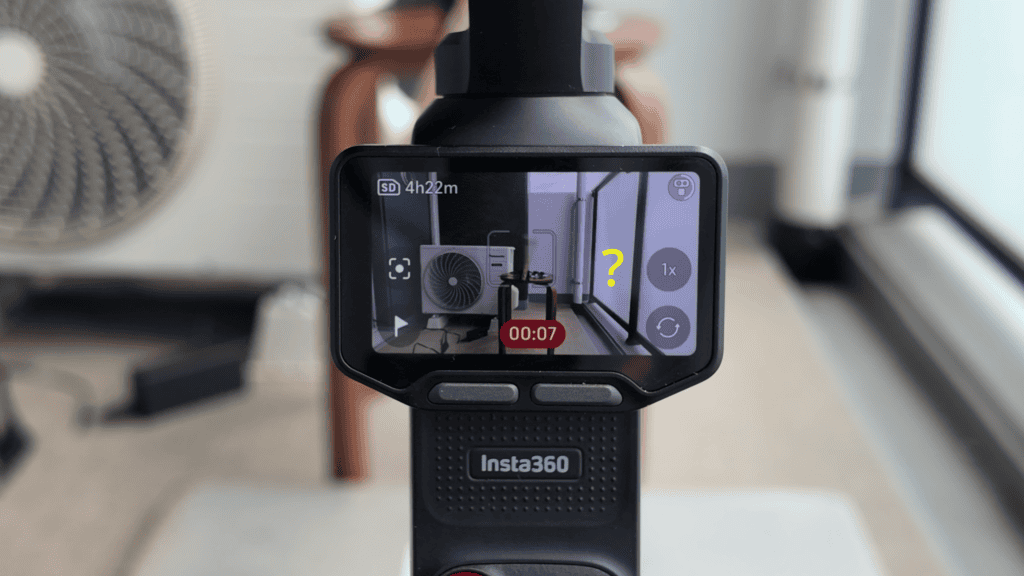
That means you have to judge exposure largely by eye.
You don’t need to get exposure absolutely perfect, especially when shooting a log profile where you have a fair bit of room for correction in post. Nevertheless, a live EV value would remove a lot of the guesswork.
The DJI Osmo Pocket series provides this kind of feedback, and I’d like to see Insta360 add something similar.
You Don’t Have to Follow the 180-Degree Rule
The 180-degree shutter rule is a useful starting point, not something you need to follow religiously.
Changing the shutter speed changes the character of movement:
Faster shutter speeds produce sharper individual frames and more staccato-looking motion.
Slower shutter speeds introduce more blur and can create a softer, dreamier look.
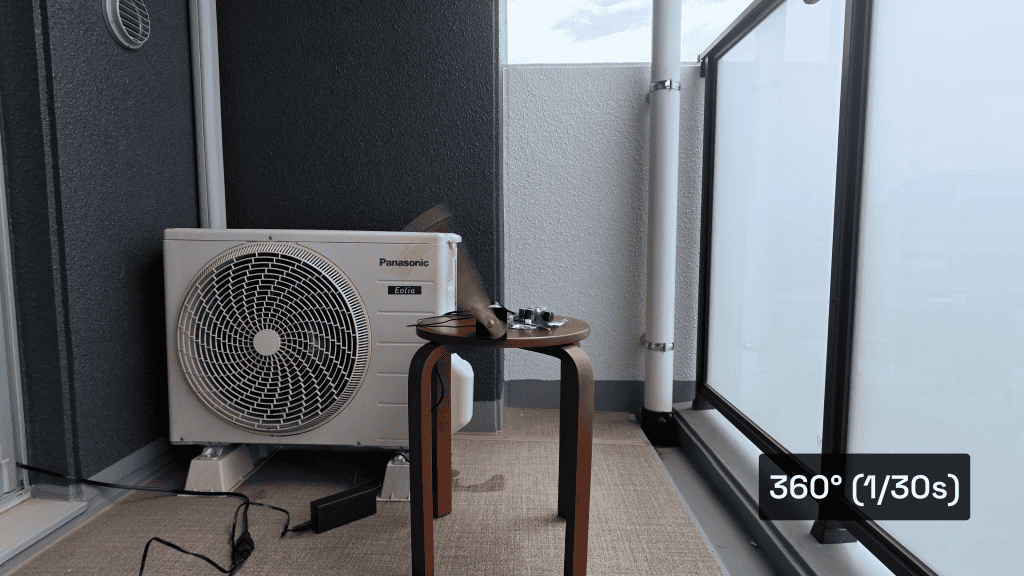
For example, at 30fps:
- 1/120 sec will look noticeably sharper than the conventional 1/60
- 1/60 sec gives the familiar natural cinematic motion blur
- 1/30 sec produces significantly heavier blur
There is no universally correct choice. Pick the shutter speed based on how you want movement in the scene to feel, then use the ND filter to make that shutter speed possible.
Choosing an ND Filter Set for the Luna Ultra
I’ve so far tested two main sets with the Luna Ultra:
- Insta360’s official ND filters, which I bought myself
- A Freewell set that was provided to me for review
From an image-quality standpoint, I couldn’t see any meaningful difference between them.
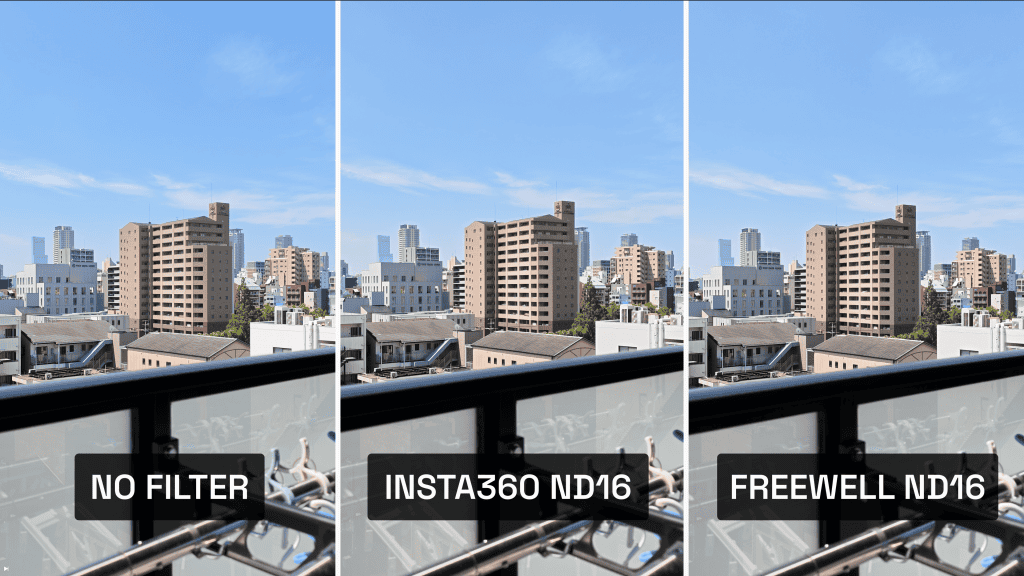
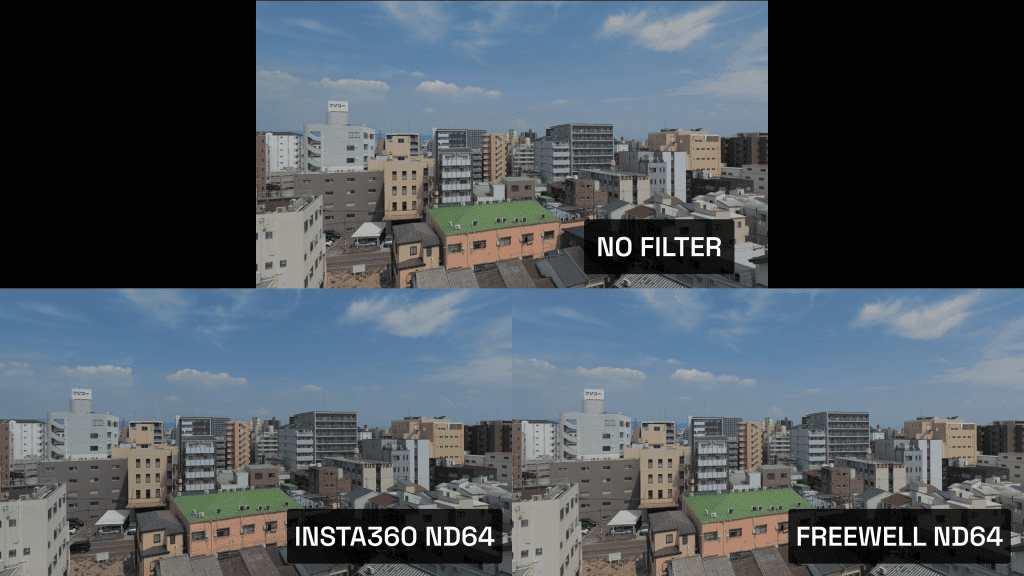
Neither introduced a noticeable color cast in my testing, even when using the strongest ND64 filters.
They are similar from a usability standpoint. Both allow the gimbal to close while a filter is attached, and both fit inside the filter storage slots built into the Luna Ultra’s protective cover.
However, the official ND filters on the Luna Ultra only feature a removal groove on one side of each filters, which makes removing them trickier.
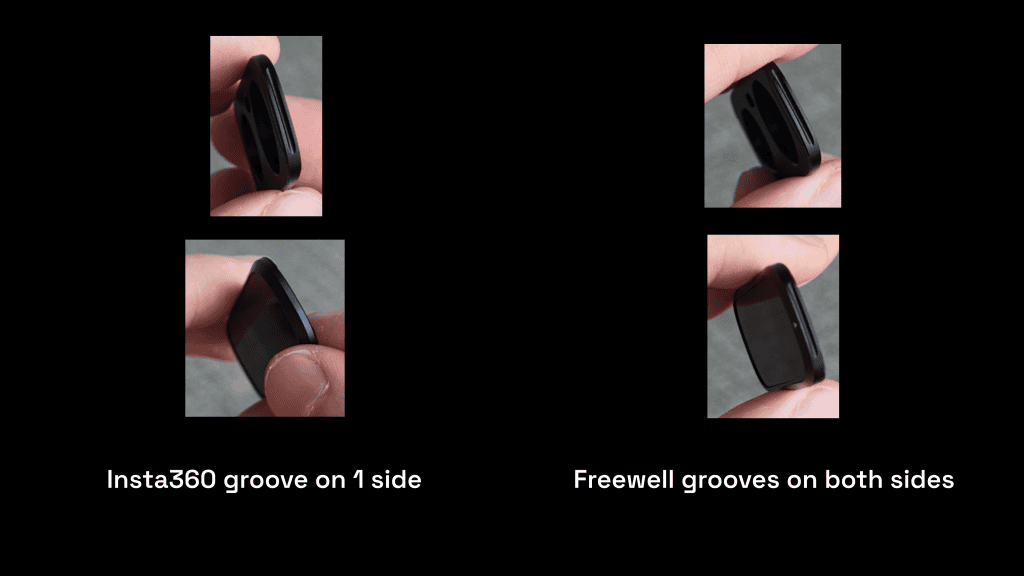
Another important difference is which ND strengths are included.
Insta360 ND Set
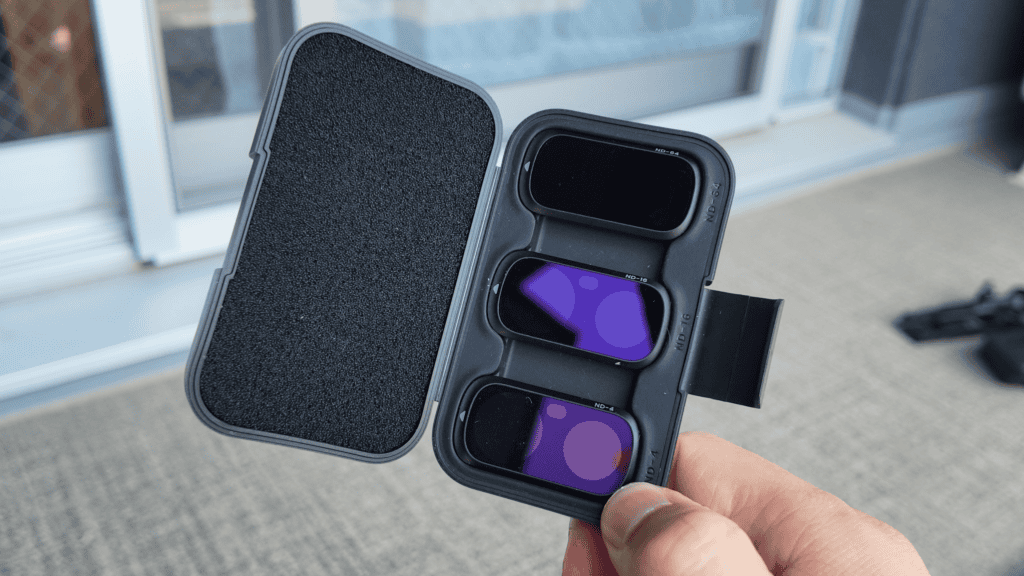
The official set contains:
- ND4
- ND16
- ND64
Freewell ND Set
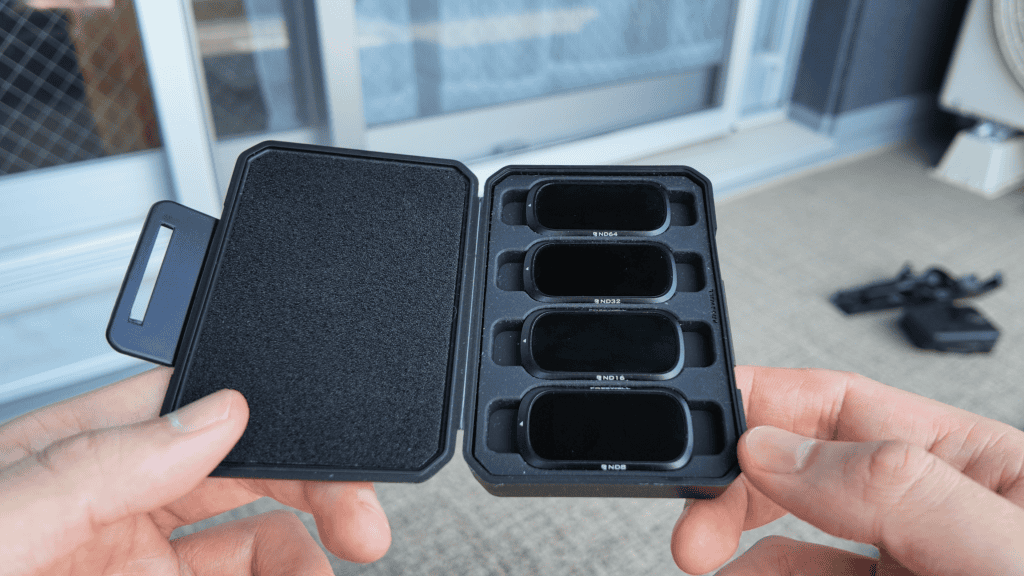
The Freewell set contains:
- ND8
- ND16
- ND32
- ND64
So far, I slightly prefer the selection in the Freewell set.
During bright summer conditions, ND64 has been essential for maintaining a 180-degree shutter in direct sunlight.
But I’ve found the ND32 almost equally useful.
There are plenty of outdoor situations where ND16 isn’t quite strong enough, while ND64 forces the camera to compensate with a higher ISO than necessary. ND32 fills that gap nicely, which is probably why so many third-party manufacturers include it.
I haven’t needed ND4 or ND8 very often so far, but they could still be useful in darker overcast conditions, or in certain indoor environments.
Fixed ND vs Variable ND Filters
Everything I’ve discussed so far has involved fixed ND filters.
Each filter has one fixed strength, so you swap filters depending on the light.
The alternative is a variable ND filter, or VND.
A VND allows you to adjust its strength by rotating a ring, which is obviously more convenient. Instead of carrying several filters, you can cover a range of light levels with a single one.
There are some disadvantages, however.
Variable ND filters work using polarizing layers, which means they can introduce effects that fixed ND filters don’t suffer from to the same extent, including polarization artifacts and color shifts.
The Luna Ultra VNDs I’ve seen also tend to cover approximately ND2 to ND32.
For my own shooting, that isn’t quite enough. During strong summer sunlight, I’ve regularly needed ND64 to maintain 1/60 second at 30fps.
For those reasons, I think fixed ND filters are the better starting point for most Luna Ultra users.
A VND may make sense if convenience is your highest priority and you mostly shoot in moderate lighting, but fixed filters offer simpler optics and access to stronger ND values.
Are ND Filters Essential for the Luna Ultra?
Not necessarily.
If you mostly shoot product videos, talking-head footage, casual vlogs or other situations where cinematic motion rendering isn’t particularly important, there’s no reason to use them.
But if you want to create more cinematic travel footage, even only occasionally, they’re one of the most useful accessories you can keep in your bag.
They can initially seem technical or inconvenient, but the workflow quickly becomes straightforward:
- Choose your frame rate.
- Decide on your shutter speed.
- Lock the shutter.
- Add enough ND to control the exposure.
- Fine-tune ISO if necessary.
After doing it a few times, it becomes second nature.
The bigger limitation at the moment is actually the Luna Ultra itself. Better exposure feedback, like a live EV readout and visible Auto ISO value, would make working with ND filters considerably easier.
Hopefully Insta360 addresses that in a future update.
Until then, there is a little more guesswork involved than there needs to be. But for the right kind of footage, the results are still worth it.